Python (Jupyter) Notebooks

Installing HomeBrew
The first step to getting setup with Python notebooks is to install Homebrew. Homebrew is a program that you install via the command line and it will allow you to install other software easily with just a few commands.
Install Homebrew (https://brew.sh/)
When you visit the Homebrew website, copy and paste the command into your Terminal. Generally, you never want to do this with any website you don’t completely trust.
/usr/bin/ruby -e "$(curl -fsSL https://raw.githubusercontent.com/Homebrew/install/master/install)"
When installing Homebrew, it will ask you for your computer’s admin password. This is the only time Homebrew asks for this info. After you install it, all other software is sandboxed in special locations to prevent malware.
Xcode Commandline Tools
During its installation, Homebrew might ask about Xcode Commandline Tools software. Simply follow the prompts to agree to the user agreement to continue. If it doesn’t, then run the following command:
xcode-select --install
If you get a warning that it’s already installed, then you’re good to go.
Installing pyenv on a Mac
Pyenv is a tool that allows you have multiple versions of Python on your computer. You find more information about pyenv on its Github page https://github.com/pyenv/pyenv. Why is this necessary? Some Python tools or libraries are written in the older versions of Python like 2.7, and newer libraries require Python 3. Pyenv easily allows you to install multiple versions on the same computer and switch between them.
brew install pyenv
Once you install pyenv using homebrew, you’ll need to do one last step to complete the setup. Run the following command as explained on the pyenv page.
echo -e 'if command -v pyenv 1>/dev/null 2>&1; then\n eval "$(pyenv init -)"\nfi' >> ~/.bash_profile
The following command puts some code in a setup file on your computer called .bash_profile. This file is read whenever you open Terminal. It establishes a linkage to the pyenv folder, so that when you run pyenv commands, they resolve correctly to the appropriate location for Python.
Finally, restart your shell with the following command:
exec "$SHELL"
You should quit and relaunch Terminal for these settings to take effect.
Using pyenv to install different verisons of Python on your computer
In your command line, you can type python --version to see which version is currently running on you computer.
python --version

Python 2.7.10
Python 2.7 is the stock version that comes with Macs with certain operating systems. It’s considered an older version, which you may want at times to run legacy software. Let’s use pyenv to install a more recent version, 3.6.8.
pyenv install 3.6.8
This installs Python 3.6.8, but on a hidden location on your computer. You can see all versions of Python installed on your computer by running pyenv versions. An asterisk is next to the currently activated version.
pyenv versions

* system
  3.6.8 (set by /Users/jrue/.pyenv/version)
To switch to a different version of Python, use the global command.
pyenv global 3.6.8
Now check the version of Python:
python --version
Python 3.6.8
You will also notice when running pyenv versions the asterisk has moved to the updated version. You can always switch back by typing pyenv global system.
Installing PipEnv Tool
Pipenv is a tool that combines a package installer, along with something called a bundler, for Python. It allows you to easily install Python packages from Github, or create your own packages to deploy to the web. More specifically, Pyenv will keep track of all the related dependencies you’ll need for a project, and install them in something called a virtual environment. A virtual environment is like a sandbox where you can install certain python modules that are specific to a certain project. This allows you to install certain libraries for each project you create.
To install pipenv on a Mac, simply use homebrew by running the following command:
brew install pipenv
Next, let’s navigate to folder where we’ll create our first project. We’ll call it python-notebook-lesson.
mkdir -p ~/Desktop/python-notebook-lesson/
cd ~/Desktop/python-notebook-lesson
Next, just for fun, let’s see what version of Python we’re using. The default on a Mac is an older 2.7 version of python.
python --version

Python 2.7.16
Creating a Virtual Environment
Next, let’s create a new Python virtual environment using Python 3.6.8. Make sure you’re in the folder you wish to create this virtual environment.
pipenv shell --python 3.6.8
We have now created a virtual environment that is specifically using 3.6.8 in the current directory. Your command prompt should also change indicating you’re in a virtual environment. (Your command prompt might vary slightly.)
(python-notebook-lesson) bash-3.2$
In addition to this command prompt changing, pipenv created two new files in this directory. The first is Pipfile which is a human-readable file that has has a list of all of the dependencies this project needs for someone else to run. The second is Pipfile.lock which is a machine generated file with all of the dependencies of the files you specified in Pipfile. You should not edit the pipfile.lock file, it will be generated automatically.
Installing Dependencies within our Virtual Environment
We can also install dependencies in this environment. Let’s install a few. We do this by using the command:
pipenv install pandas jupyter numpy matplotlib seaborn scipy
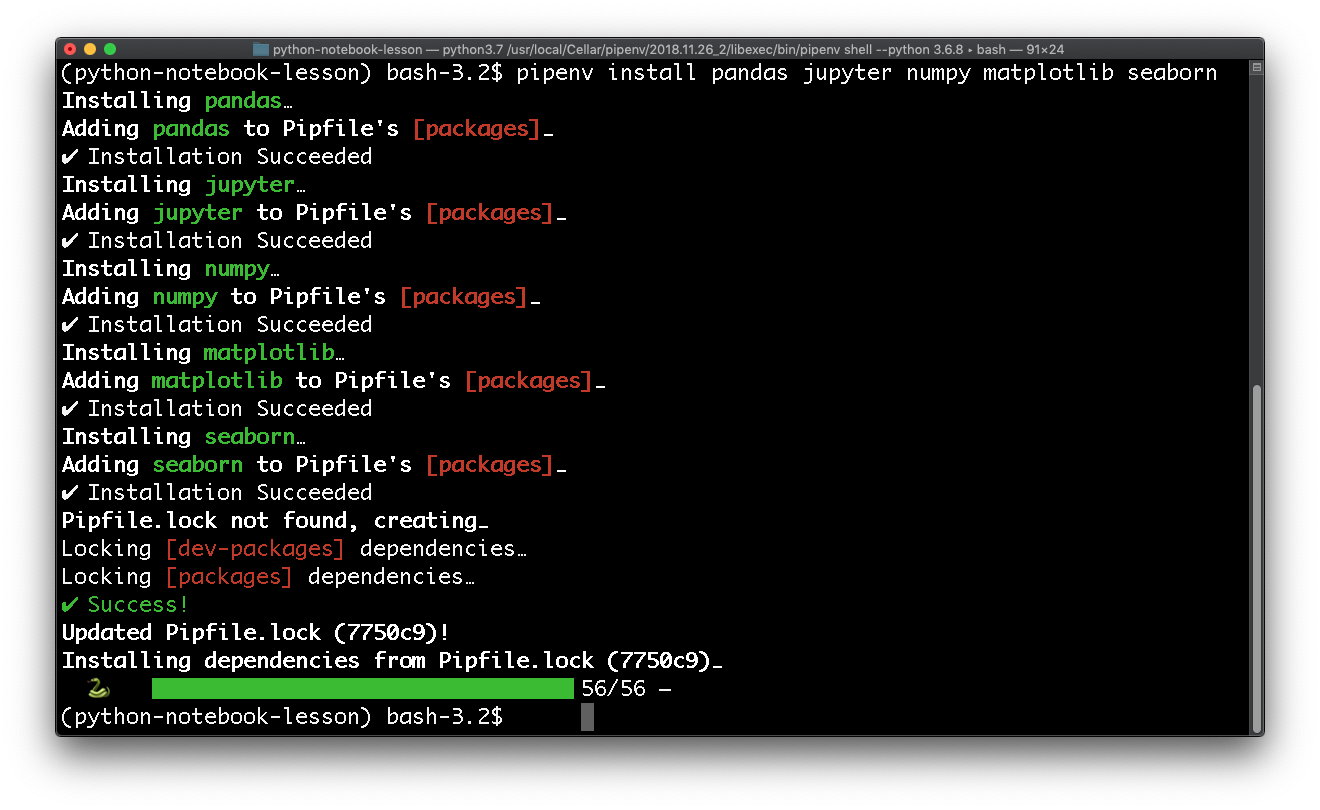
These Python libraries are installed specifically in this virtual environment. If we were to leave our virtual environment, we would no longer have access to these libraries.
Exiting your virtual environment
To leave you’re virtual environment, simply type exit.
exit
You will be taken back to your computer.
If you want to reenter your virtual environment, navigate to the folder with your Pipfile and type in pipenv shell.
pipenv shell
Un-install a package with pipenv
If you mistakenly installed a package you no longer need, you can uninstall a package from your virtual environment by typing pipenv uninstall followed by the name of the package.
pipenv uninstall [package name]
If something goes wrong
If you mistyped a package, or one of the dependencies couldn’t install correctly and gave you a bunch of errors, you can safely delete the Pipfile.lock file, and edit your Pipfile to fix the names of your dependencies. The pipfile.lock will be automatically regenerated whenever you run pipenv shell.
Running Jupyter Notebook
Note: To simplify this process, simply download the Jupyter notebook for the next part of this lesson here:
git clone https://github.com/jrue/python-notebook-lesson.git .
Manually creating the aforementioned notebook
Let’s launch our Python Notebook:
jupyter notebook
This should launch Jupyter Notebook in your browser window.
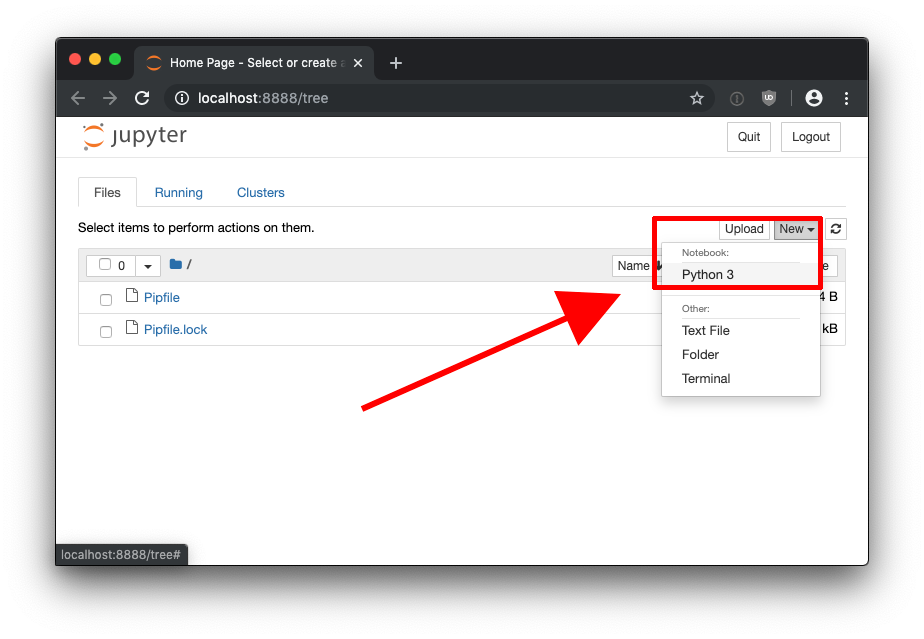
Click on the new button, and select Python3 from notebooks.
From this page, you can input commands in each cell, and press shift + return to run a command.
Pandas Lesson
Check out these cheat sheets from the pandas website:
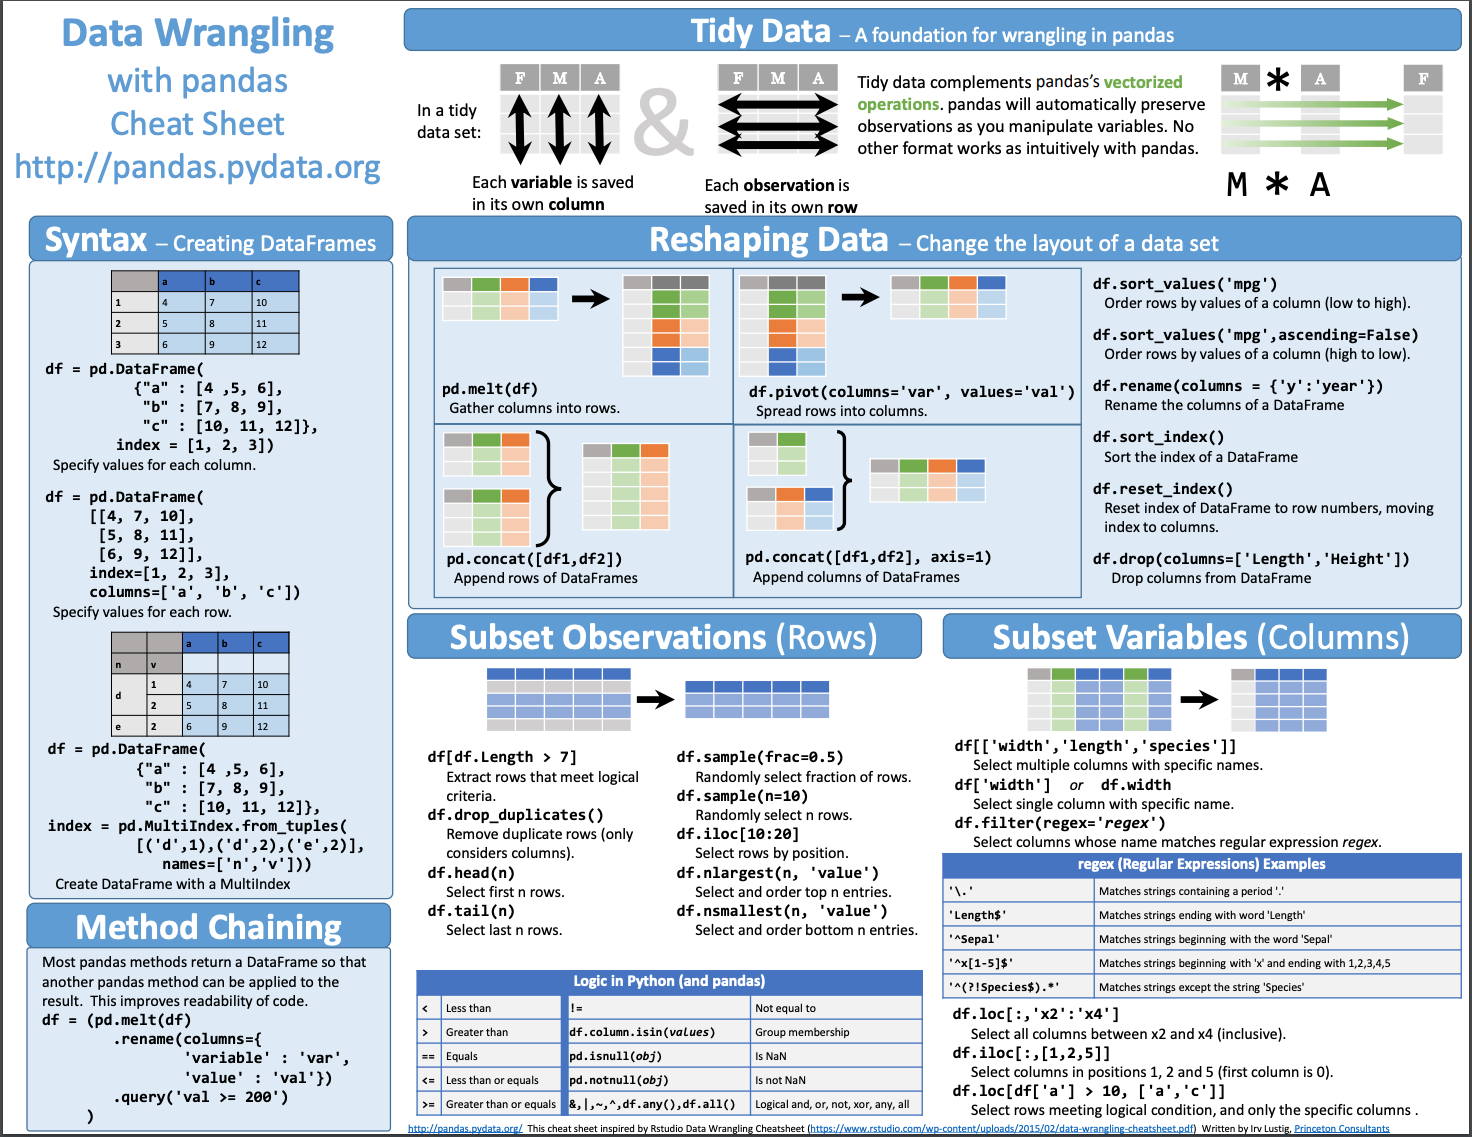
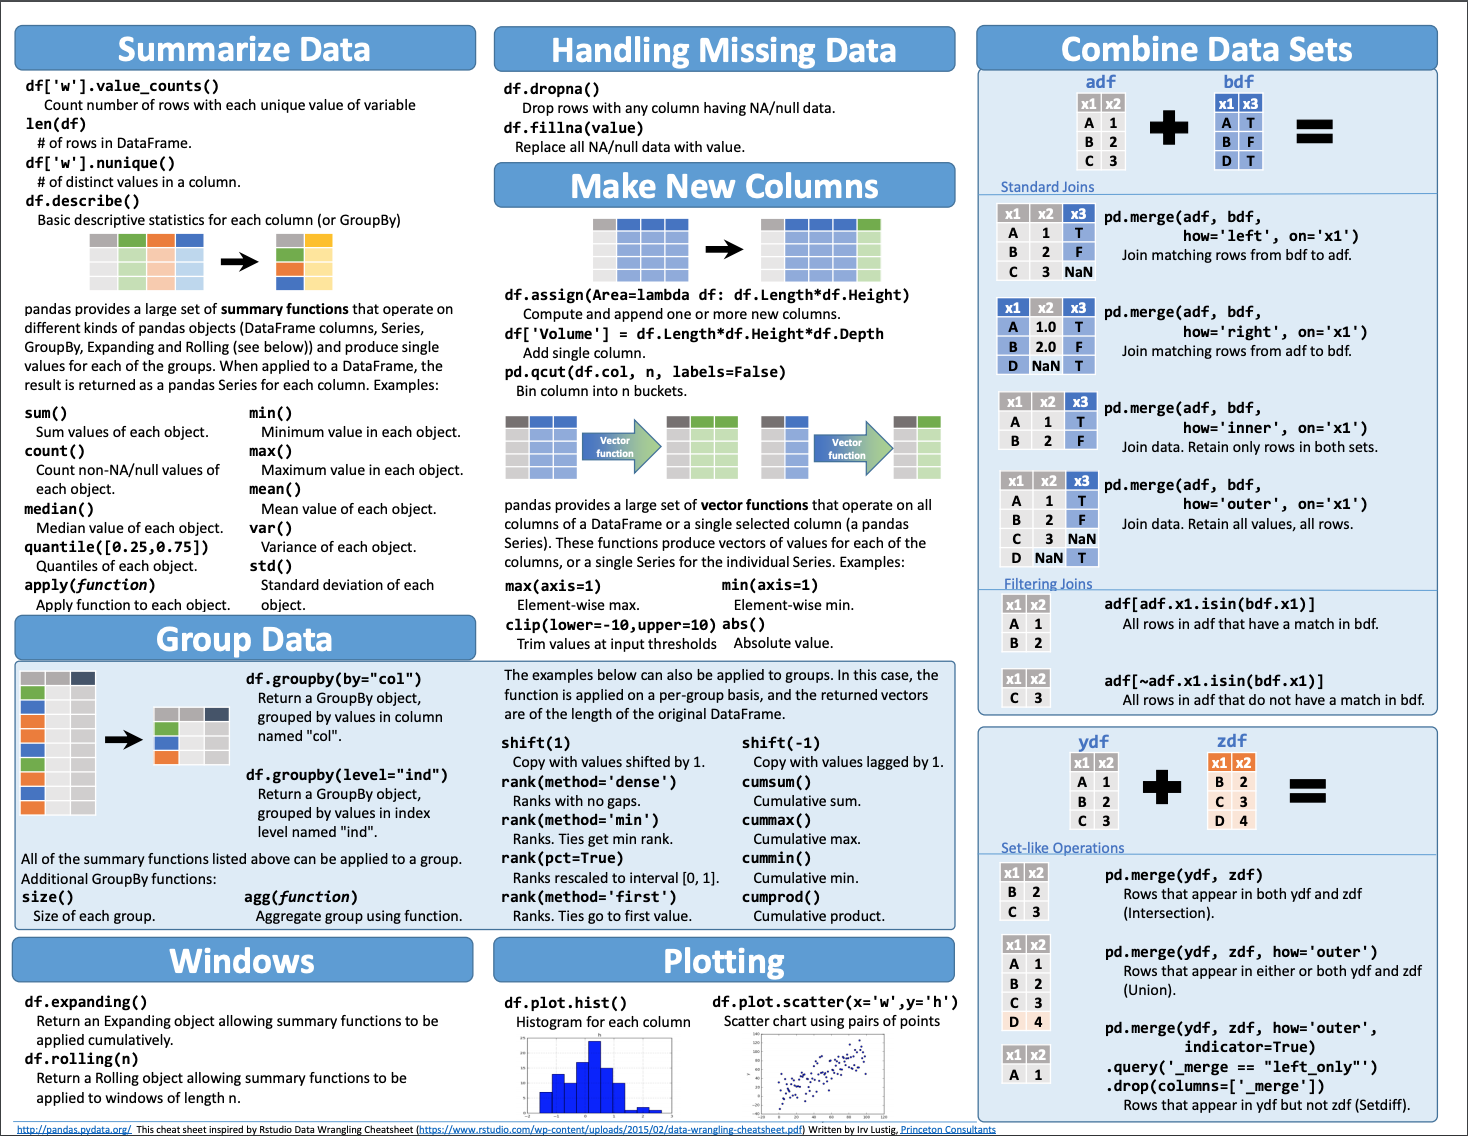
A full resolution PDF of both these sheets are available on the Pandas website