Introduction
Adobe Photoshop is the industry standard tool for working with digital images of any kind. Images may originate from a digital camera, from scans, from stock photo libraries, from existing Web-ready artwork, or even graphics that are created purely in Photoshop.
Photoshop has a tremendous breadth of uses in various industries ranging from photographers to graphic artists. The program is so flexible, it is is used for both adjusting photographs and creating graphic elements.
As a beginning-level study, this tutorial will primarily focus on the photography aspects of the program as used in a journalistic sense.
What Adobe Photoshop can do:
- Crop or resize images
- Adjust tonal properties such as lightening a dark image
- Color correction of images
- Dust and scratch removal
- “Improve” photos that might just look OK
- Sharpening and improving clarity
- Opening or saving in a variety of file formats
What Adobe Photoshop cannot do:
- Make a very blurry photograph clear
- Increase the size of a very small image found on the Web to a large one with no quality loss
- Salvaging a bad photo that is very dark, or even worse, very bright (It can improve salvage poor-quality photos)
- Photoshop can actually do quite a bit more than these listed items, but for the purposes of this tutorial the focus will be using the program as a photography tool in a journalistic sense.
The photo for this lesson can be downloaded here:
https://multimedia.report/images/tutorials/photoshop/photoshopsample.jpg
Workspace Layout
First, let’s get familiar with the general Photoshop layout.
 The Adobe Photoshop workspace is highly customizable for all of the various situations in which different industries might use the program. Therefore, it’s easy to change things around in such a way that the program is nearly unrecognizable. A good way to stay consistent with the images we show when following this tutorial is to change the layout to the default mode.

On the top menu bar, navigate to the Window → “Workspace” menu and choose “Essentials (Default).”
This will arrange the windows and various “palettes” to a default setting. Notice, this menu gives other default layout options, including options to save a particular layout. This is especially useful for computers that are shared by multiple people.
Options Bar
Now let’s take a look at the top options bar:

This options bar is just below the main menu on Mac computers. The thing to know about this particular part of the workspace is that it is contextual in nature. That means the options displayed will change depending on which tool is selected. In the example image above, the options for the Selection tool are displayed. As you click through the different tools, different options pertaining to each of those tools will be given.
Tools Palette
Photoshop is well-known for its standard tools pallet. Many of the icons used for the tools in Photoshop have become industry standards across all types of software. Video editing, sound editing, Web design and many other types of software share the same symbols used in the tools palette.

(This tool palette image might look slightly different than your computer in the sense that there are two rows of tools as opposed to one. This was done intentionally so the example image could fit in this tutorial.)
One thing to notice about each of these tools is the small triangle in the lower right hand corner on each of the buttons. That small arrow signifies that there is more than one tool to choose from in that button.
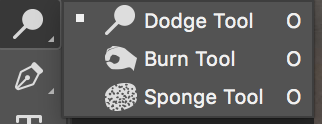
To reveal the other options, click and hold down the button and a small window will pop up offering additional tools.
Common Tools

The crop tool is used to cut off a portion of your photo. This is one possible way to make a photo smaller. There are other options which allow you to resize the image as you crop. The crop tool is one of the few tools that doesn’t have any hidden tools beneath it.

The lasso tool is used to select a specific part of a photo. Use this tool to draw a shape on your photo, which will form a selection marquee (sometimes called “marching ants”). Now any adjustments you make will only affect this portion of the photograph. When you click and hold this button, several other selection tools are displayed, which give you varying methods of making your selection.

The text tool is pretty intuitive. It allows you to add text to your image. The text tool can be used in one of two ways. You can click once on your image using the text tool to type lined text, or you can click-and-drag in order to create a text box which allows you to format the space your text occupies. Any text placed on your image will become part of your image once you save the document for Web publication.

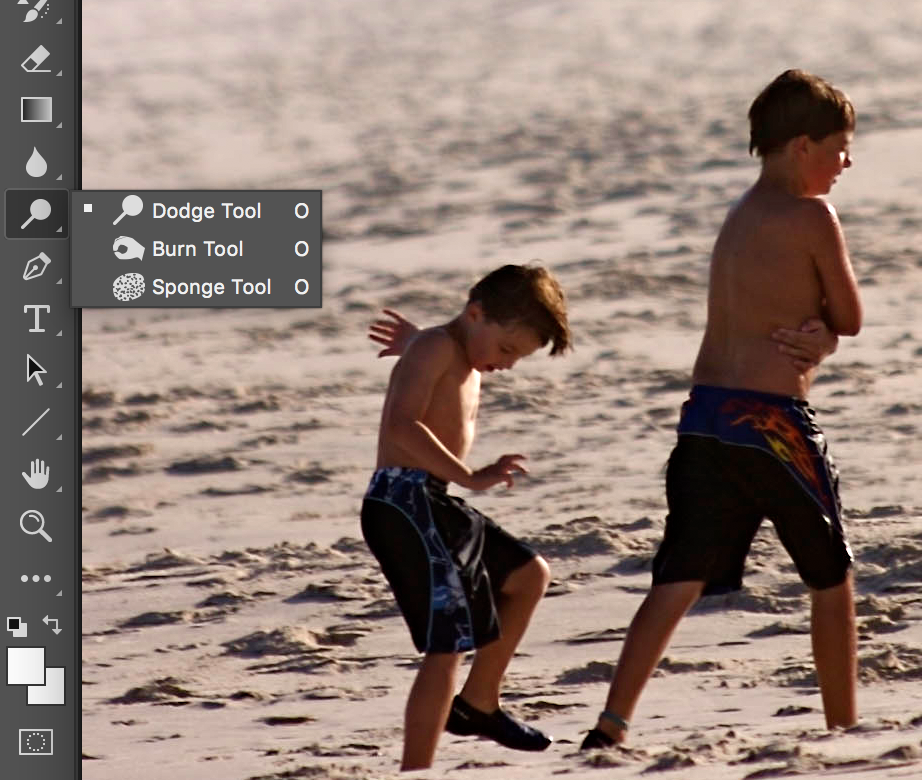
The dodge and burn tools are a throwback to the days of darkroom printing. In a darkroom, using a piece of cardboard to shield (dodge) light from the photographic paper would cause it to lighten. Or, making a hole shape with one’s hands could force light into a particular area to darken (burn) the image in a particular area. These tools allow you to do just that. Notice the options bar settings at the top. The opacity setting in particular allows you to gradually implement these tools.
 The rubber stamp, or clone tool is a blessing and a curse to Photoshop. It allows the user to manipulate the photo in some pretty drastic ways by sampling a particular area of a photo, and stamping it in another area. To sample, press and hold the ALT key. Use of this tool is generally considered unethical in most journalistic senses, but can be used appropriately for removing dust particles that may have been on the lens when the photo was taken.
UNDO and History palette
As with most professional production software Command-Z (Mac) or CTRL-Z (PC) is the “undo” command that will undo the last action you took. Photoshop will only allow you to undo the last step when using this keyboard shortcut. Then the same combination becomes a REDO command.
UNDO is your friend!
To undo more than one action, you have to pull up the History palette. You can do this by going to the Window → History menu.
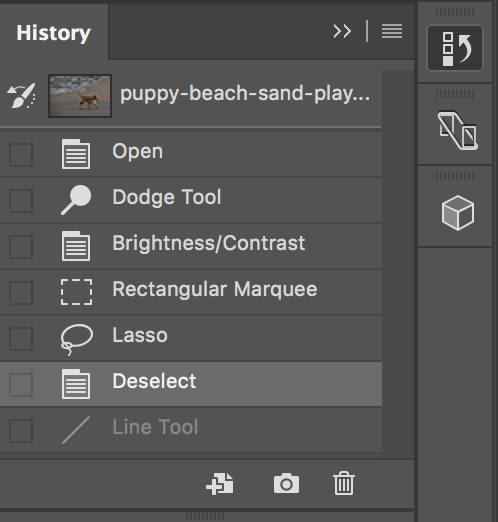
The History palette, as well as several other palettes, are docked in a bar on the right site of the screen. Click on the corresponding icon to display the windows, or you can grab the windows and drag them to other parts of the screen.
The history palette will store every action you take in the program as a list. To undo, simply click on a previous item on the list and it will undo every action listed after it. If you complete another action, it will erase actions you’ve previously undone.
Cropping and Orientation
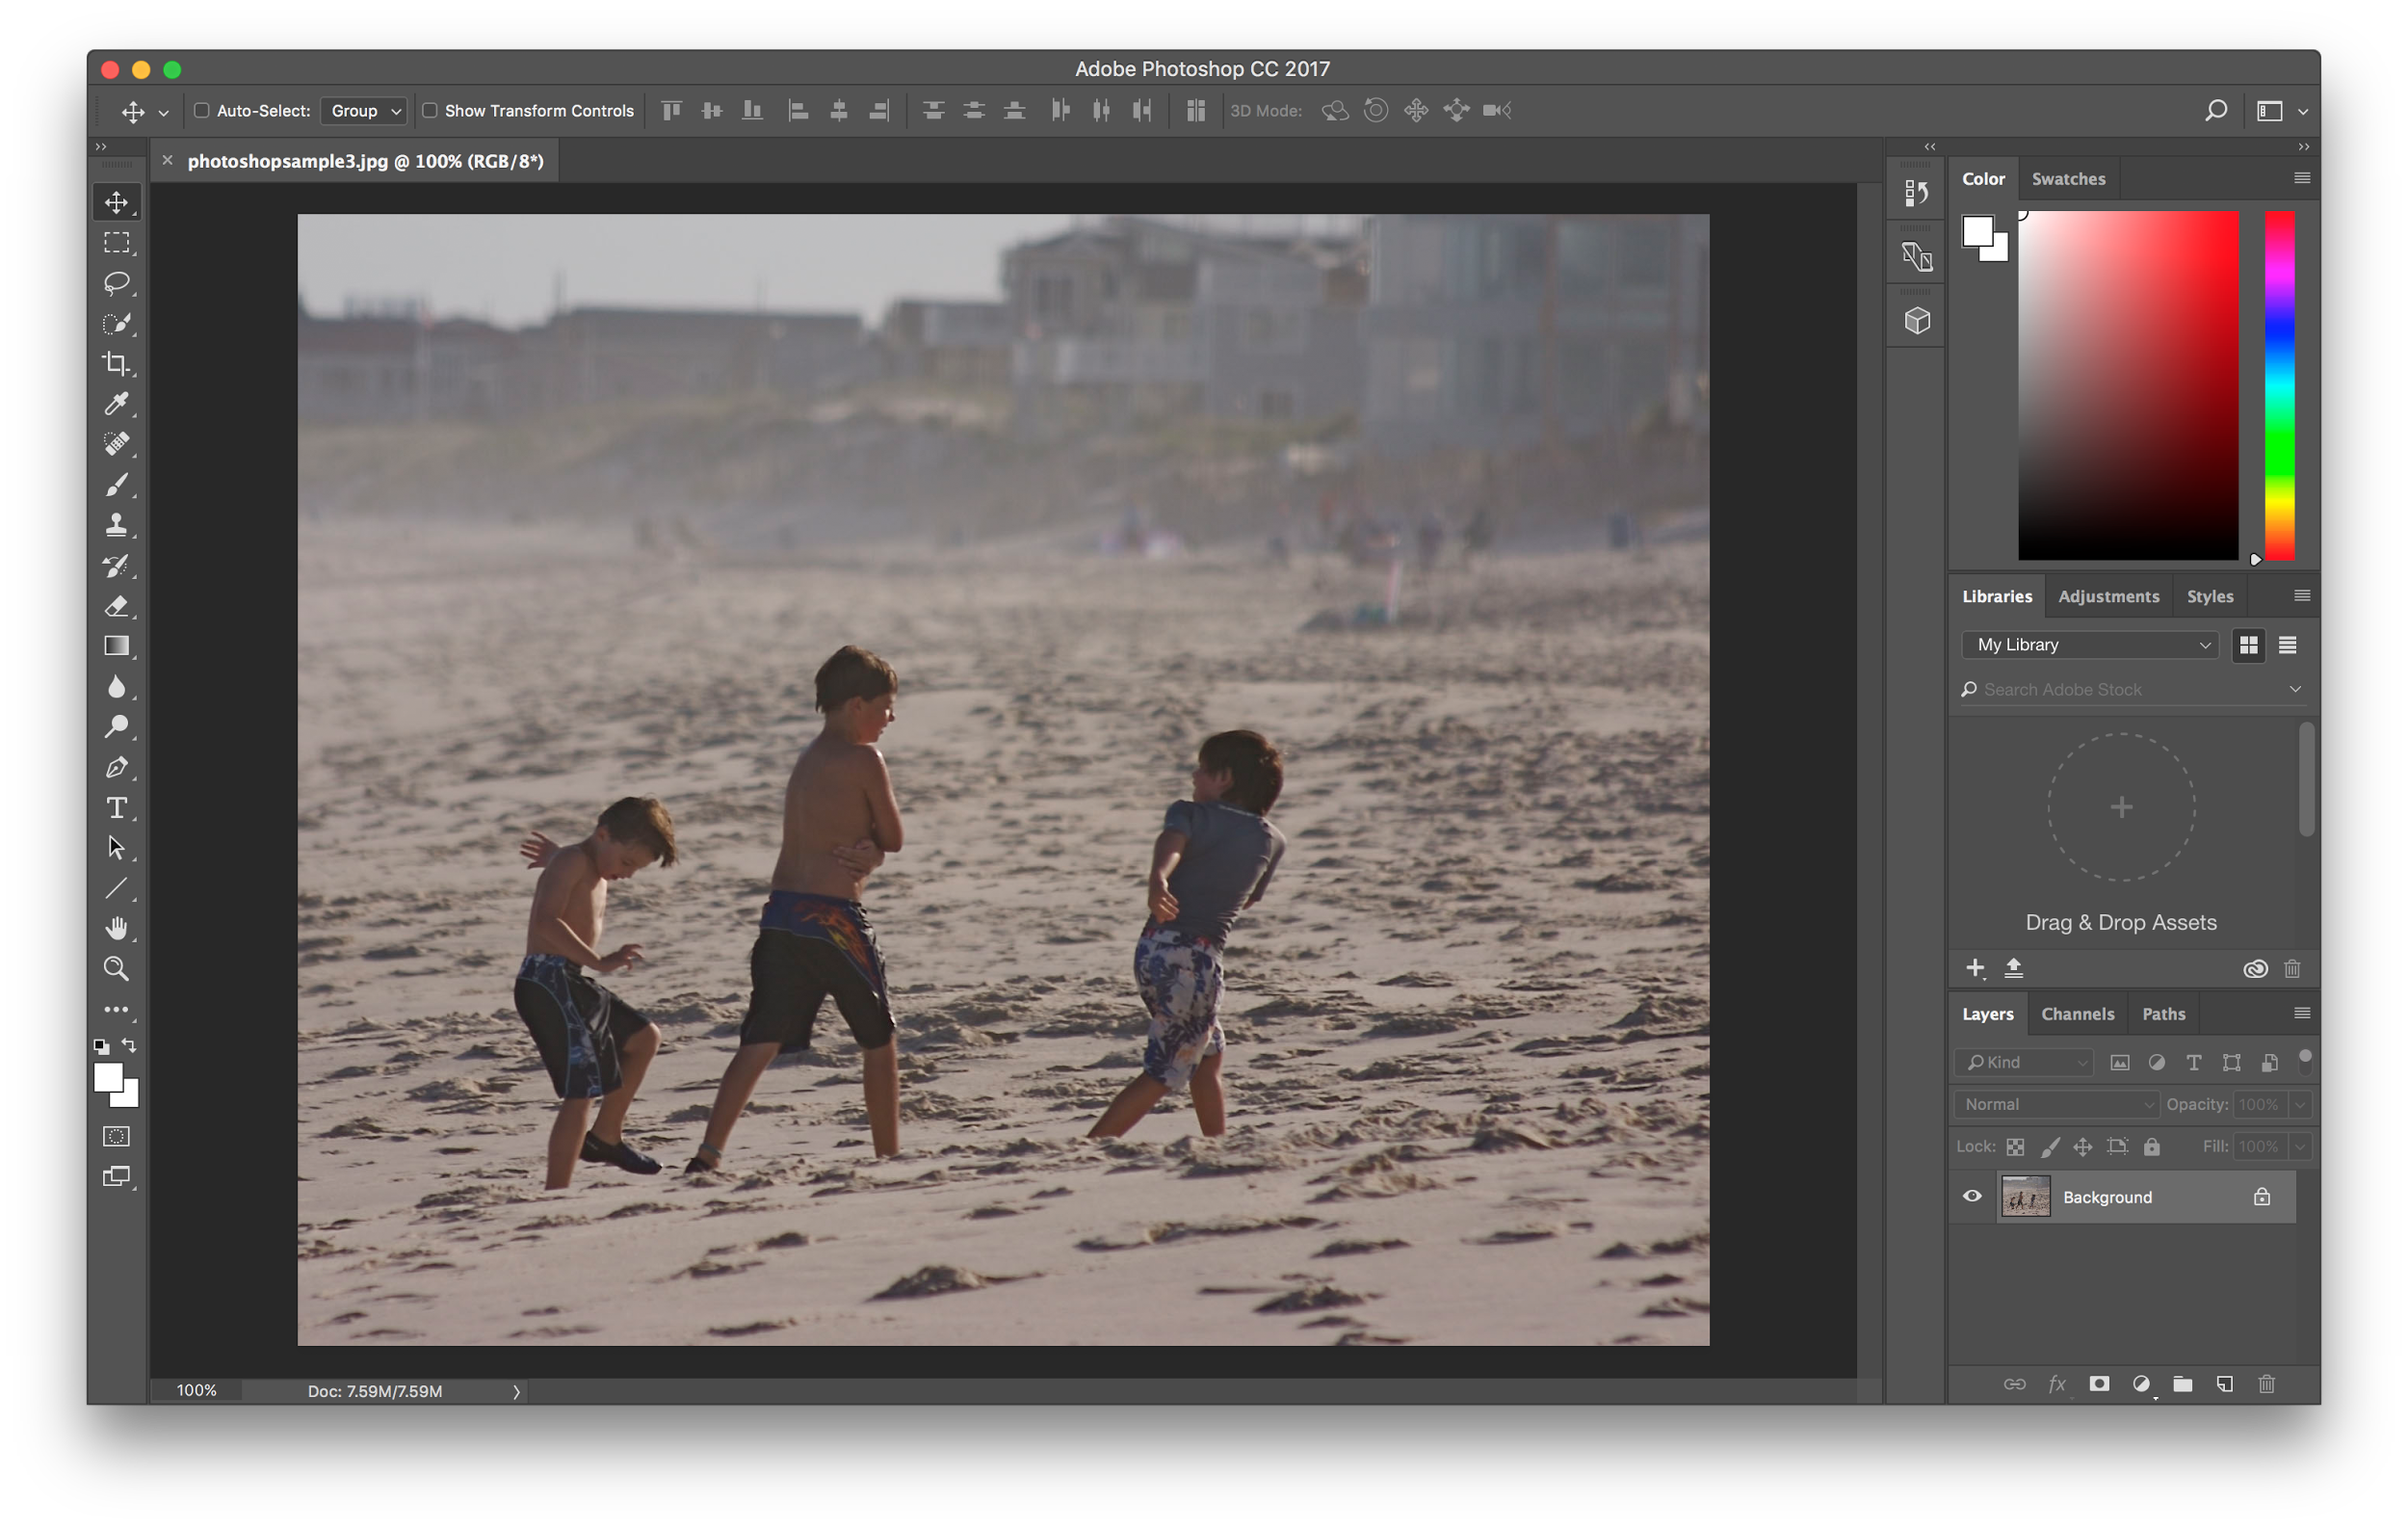
Opening an image
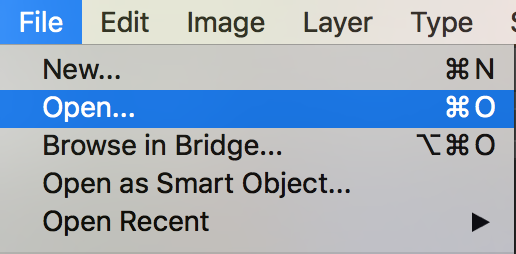
To open an image, click on the File menu and select Open.
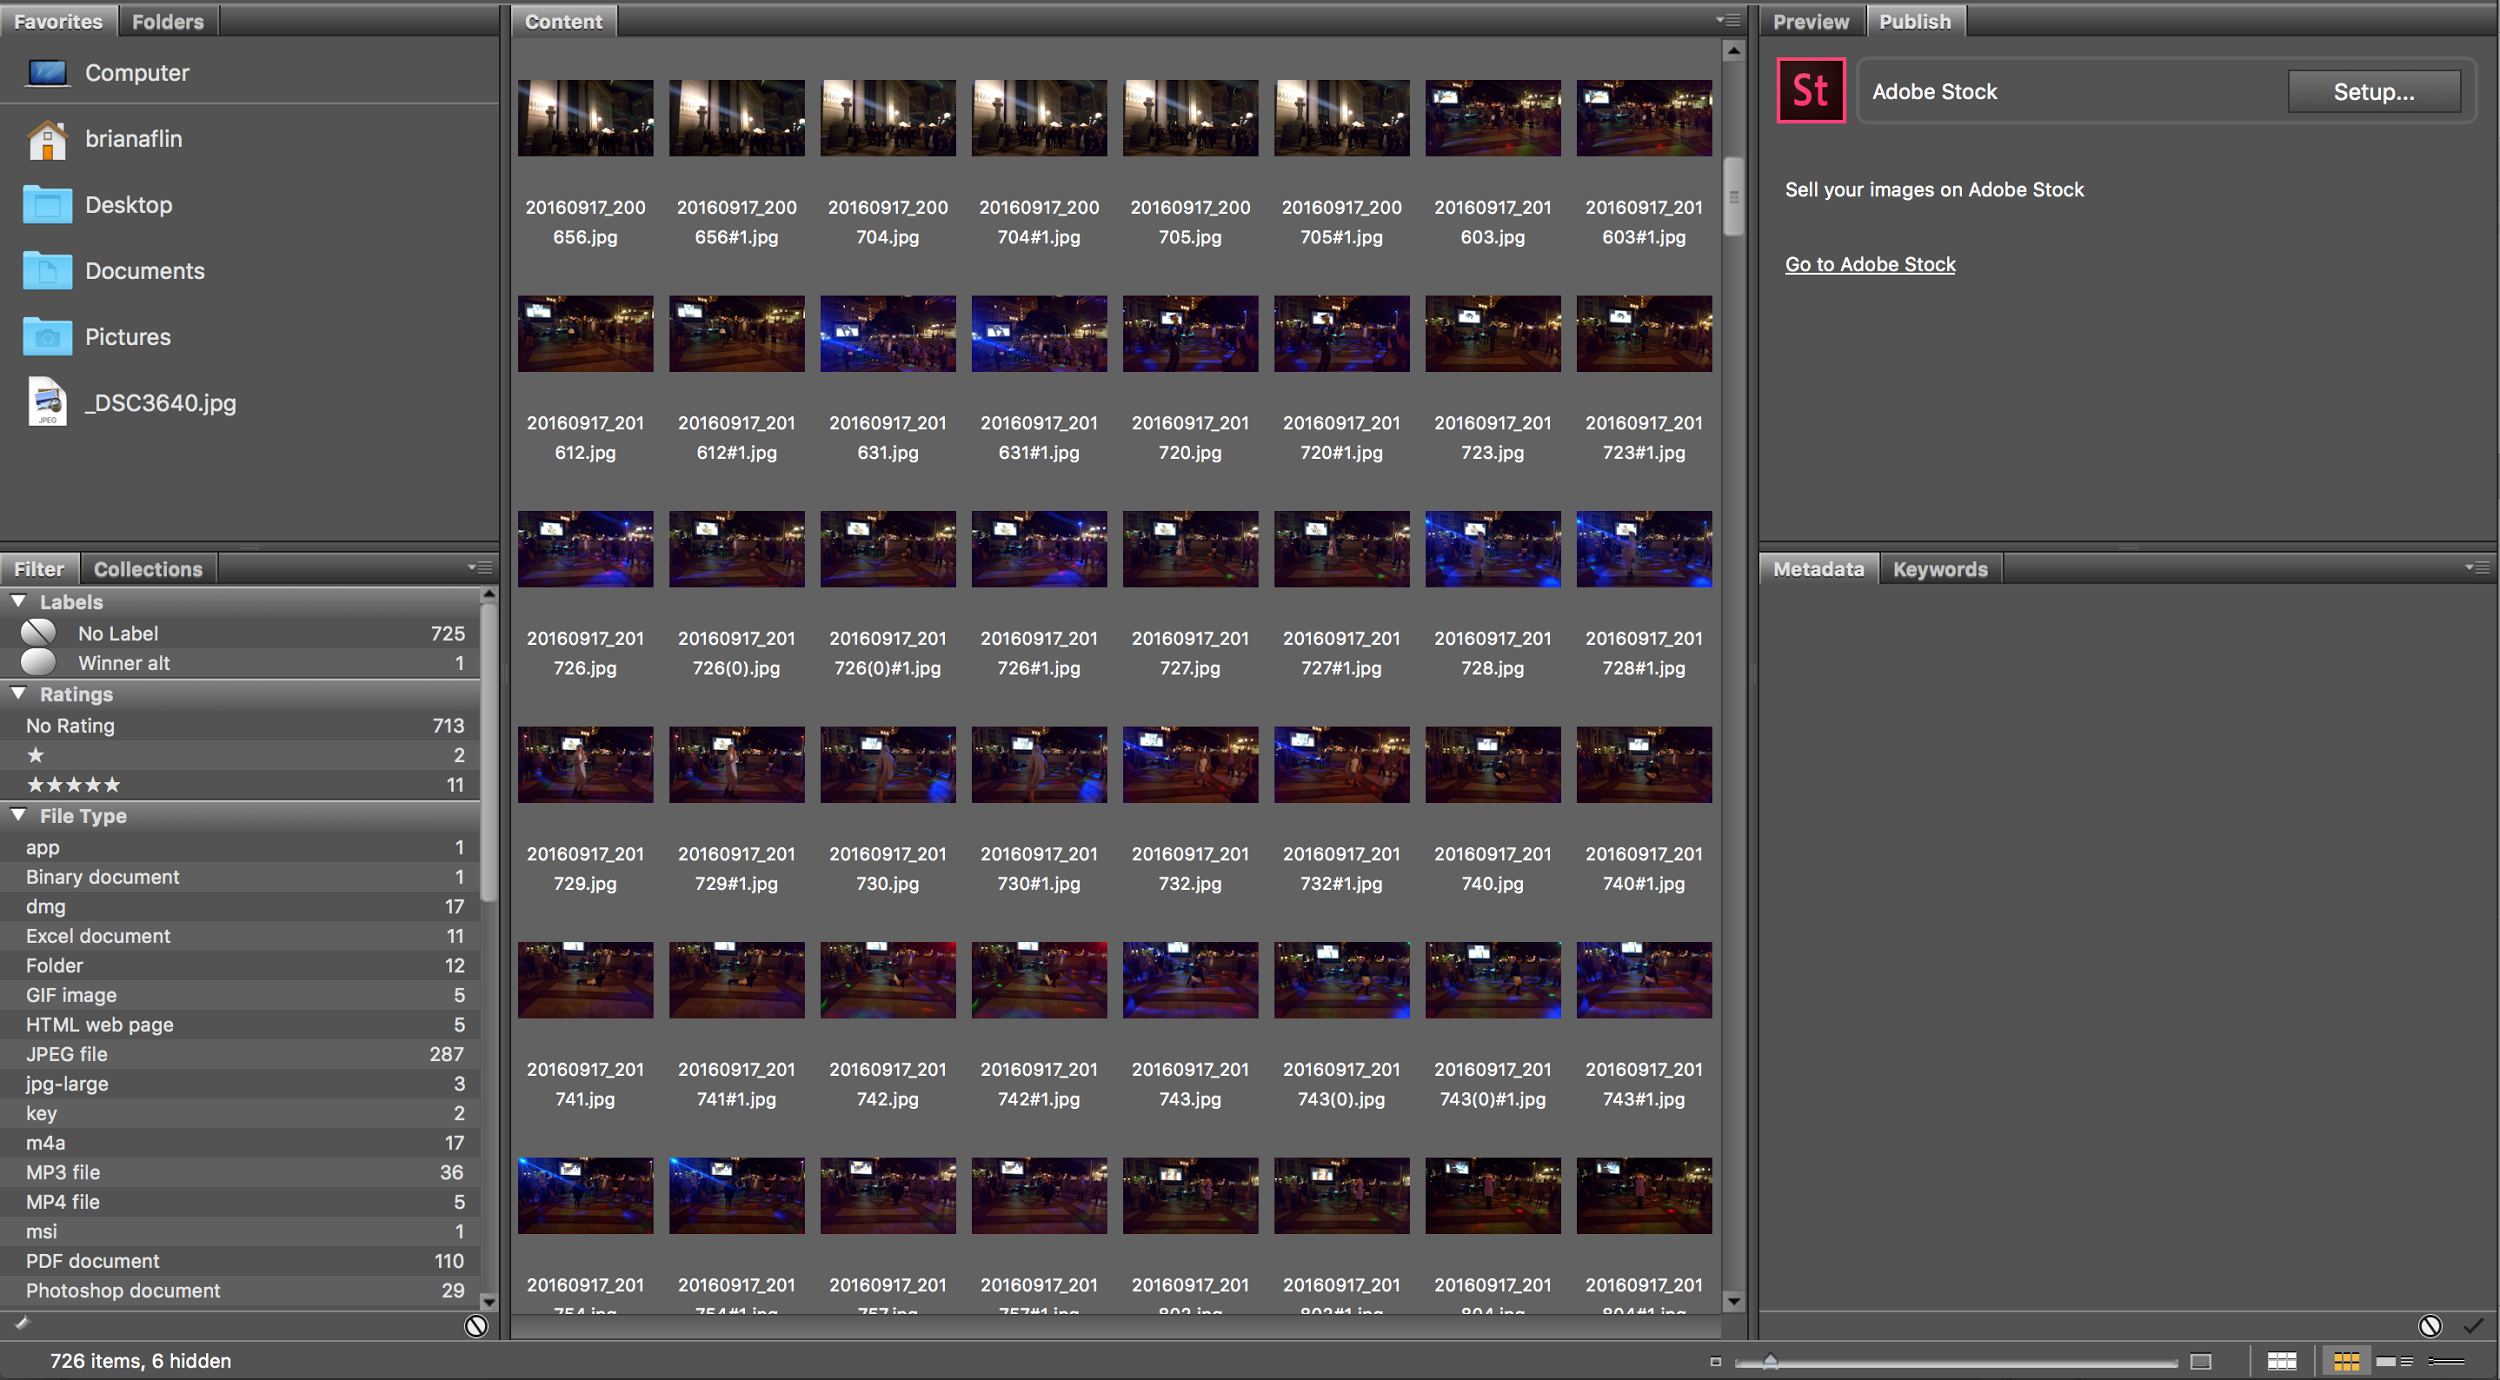
But first, let’s briefly explore the Browse in Bridge option. When you click this, Photoshop will automatically launch another program called Adobe Bridge. Bridge is a way to preview thumbnails from folders. This is a good solution if you have lots of images and are not sure which image name you’re looking for.
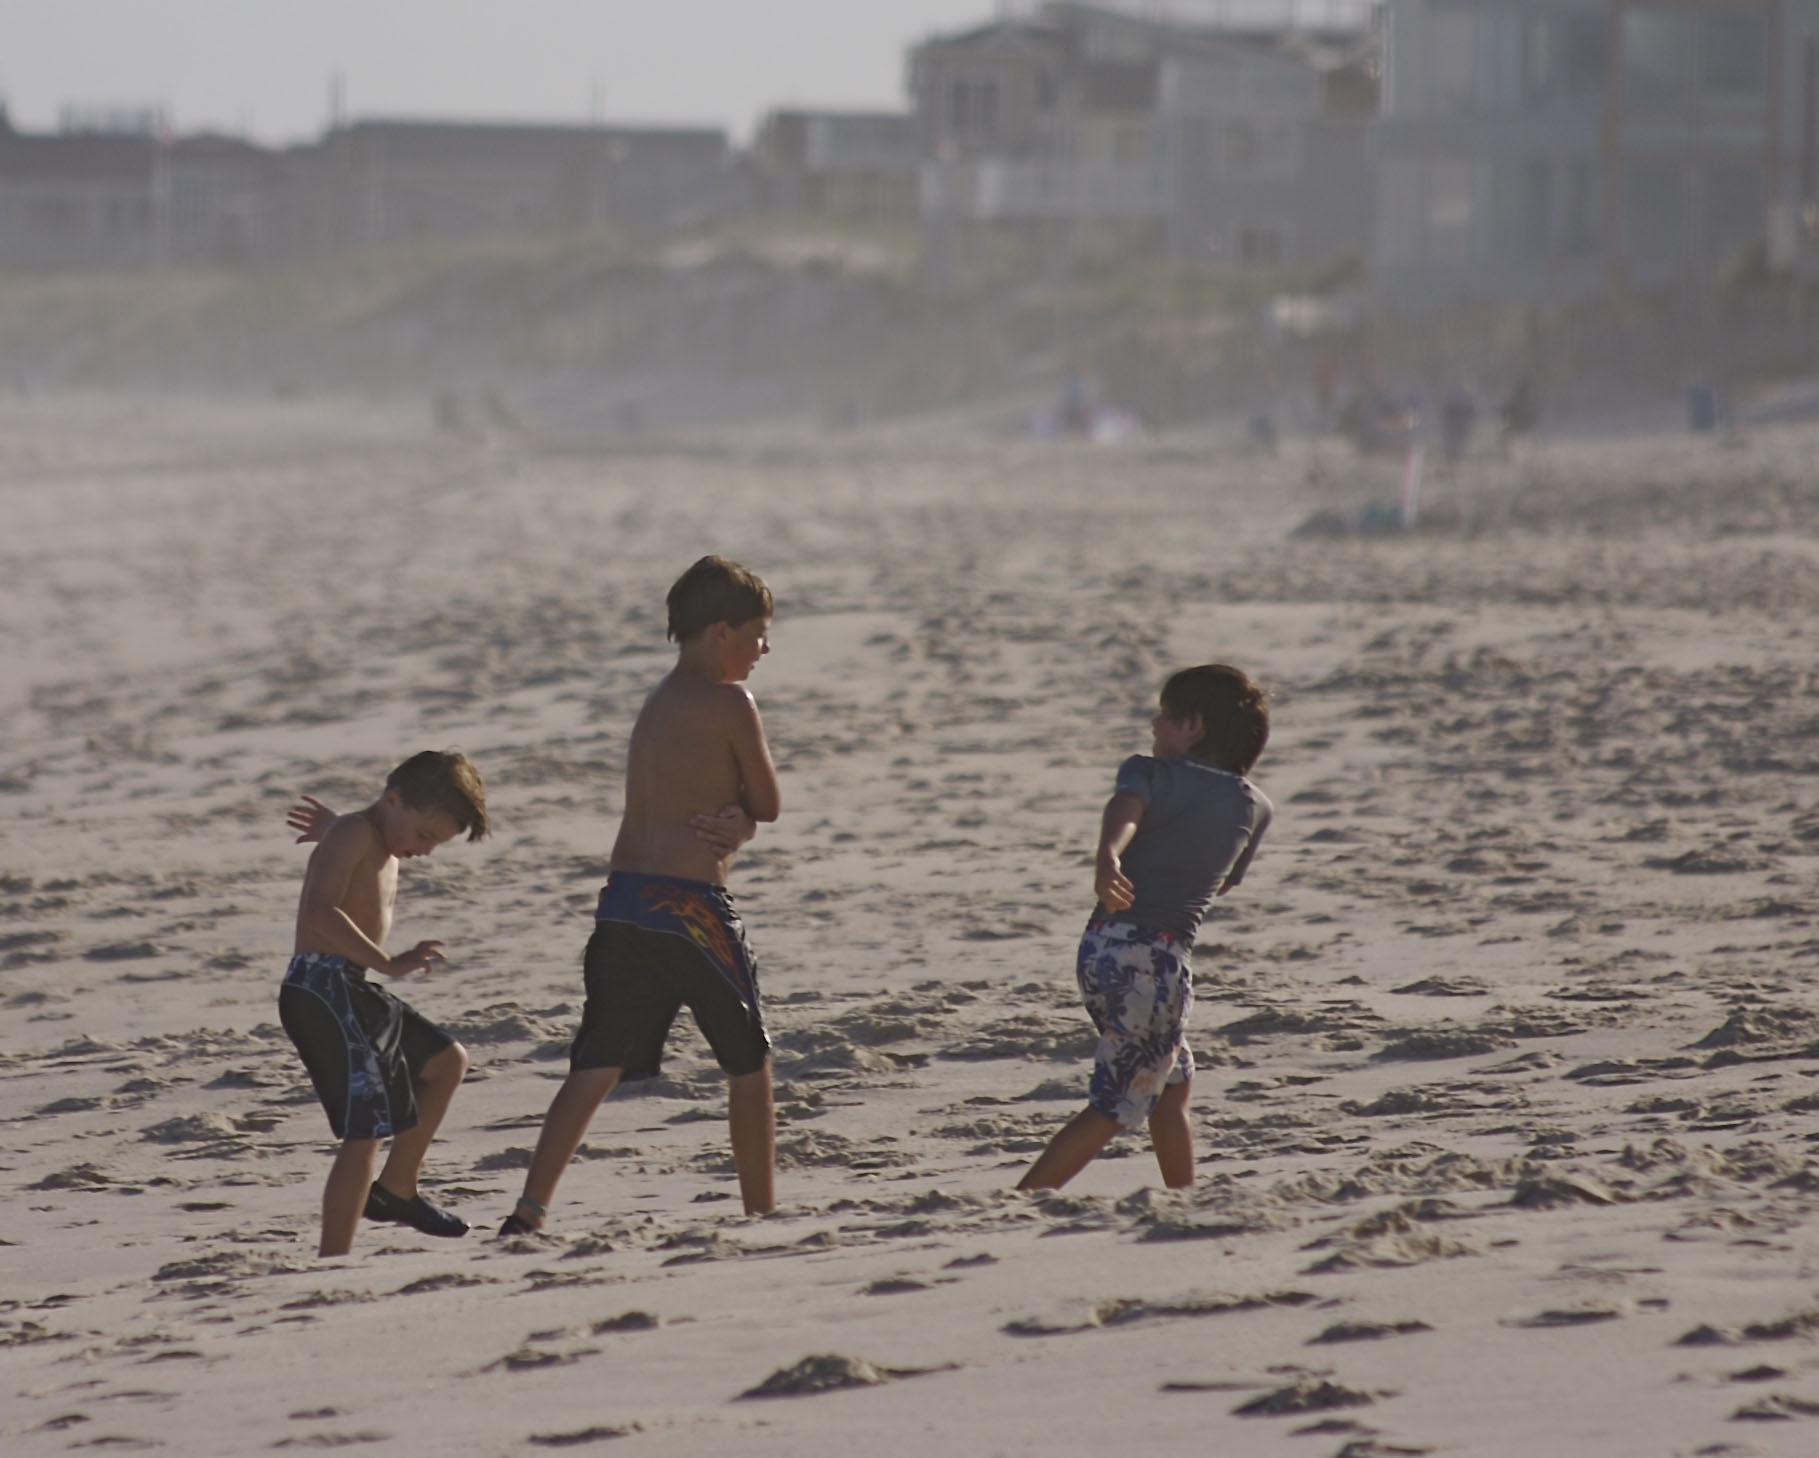
If you’re wishing to follow along this tutorial exactly, download the following image, then open it in Photoshop:
Right-click (For Macs, control-click) and save this link
Rotating images
In some rare cases, images coming out of a camera may need to be rotated. Most modern cameras have sensors that detect the orientation of the camera when you took the photo, and will automatically straighten the photo for you! Every now and then, however, the sensor either fails, or more likely, you are getting an image from a scanner, in which case you will likely have to rotate your image.
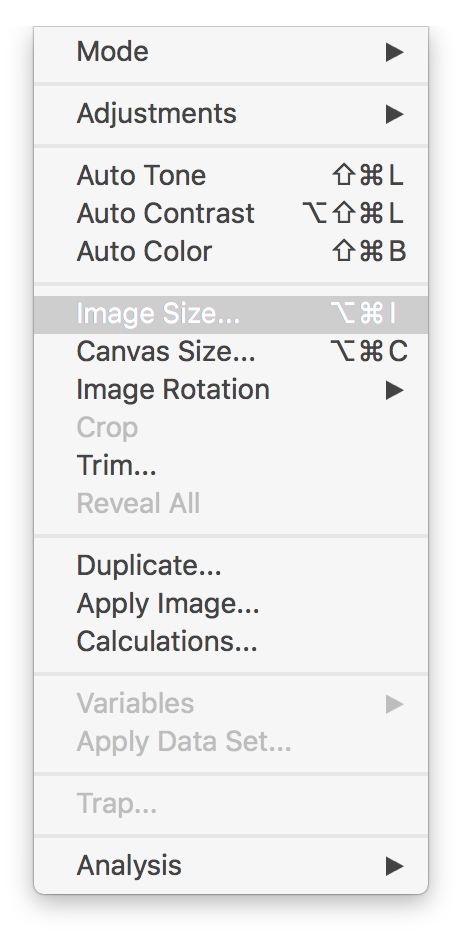
Rotating images is a fairly simple process. Go to the image menu and select Image Rotation.

Most likely, you will have to select either 90 degrees Counter Clockwise (90 CCW), or 90 Clockwise (90 CW) depending on which way the photo is situated. Click 180 degrees if the photo is completely upside down.
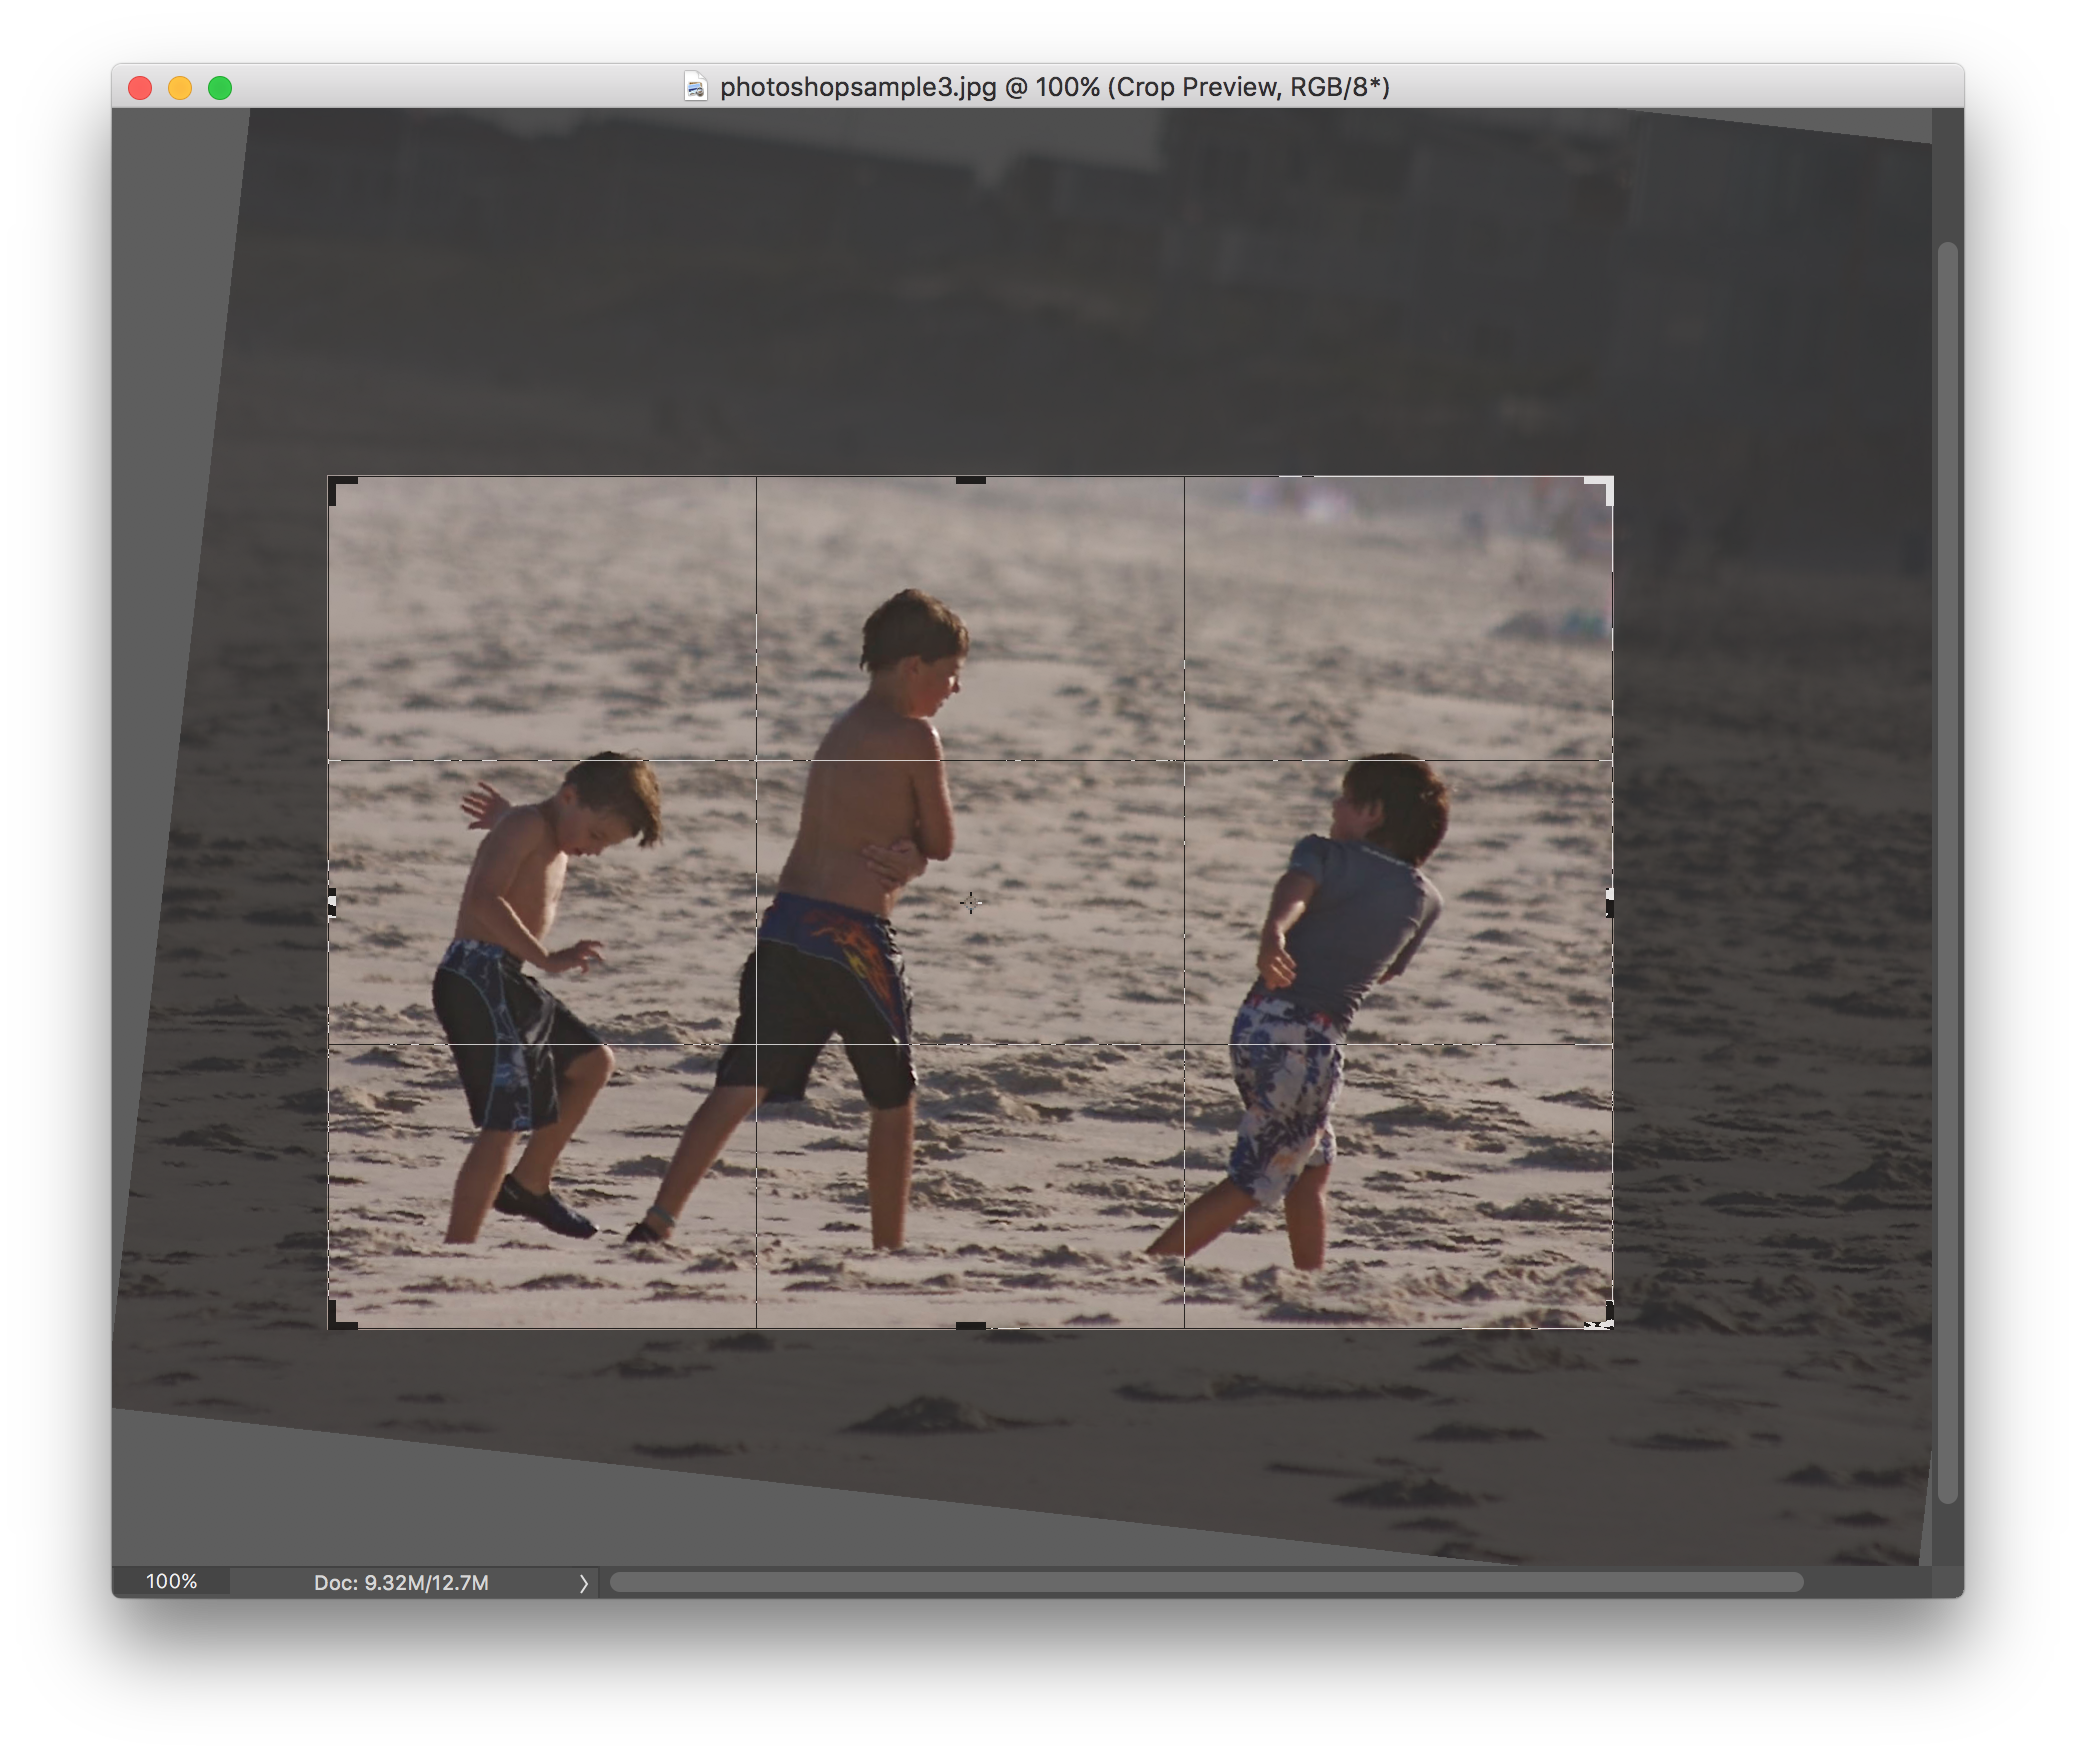
Using the crop tool
Once you have the image open, click on the crop tool in your tool palette.

Next, click and drag open a box on your image.
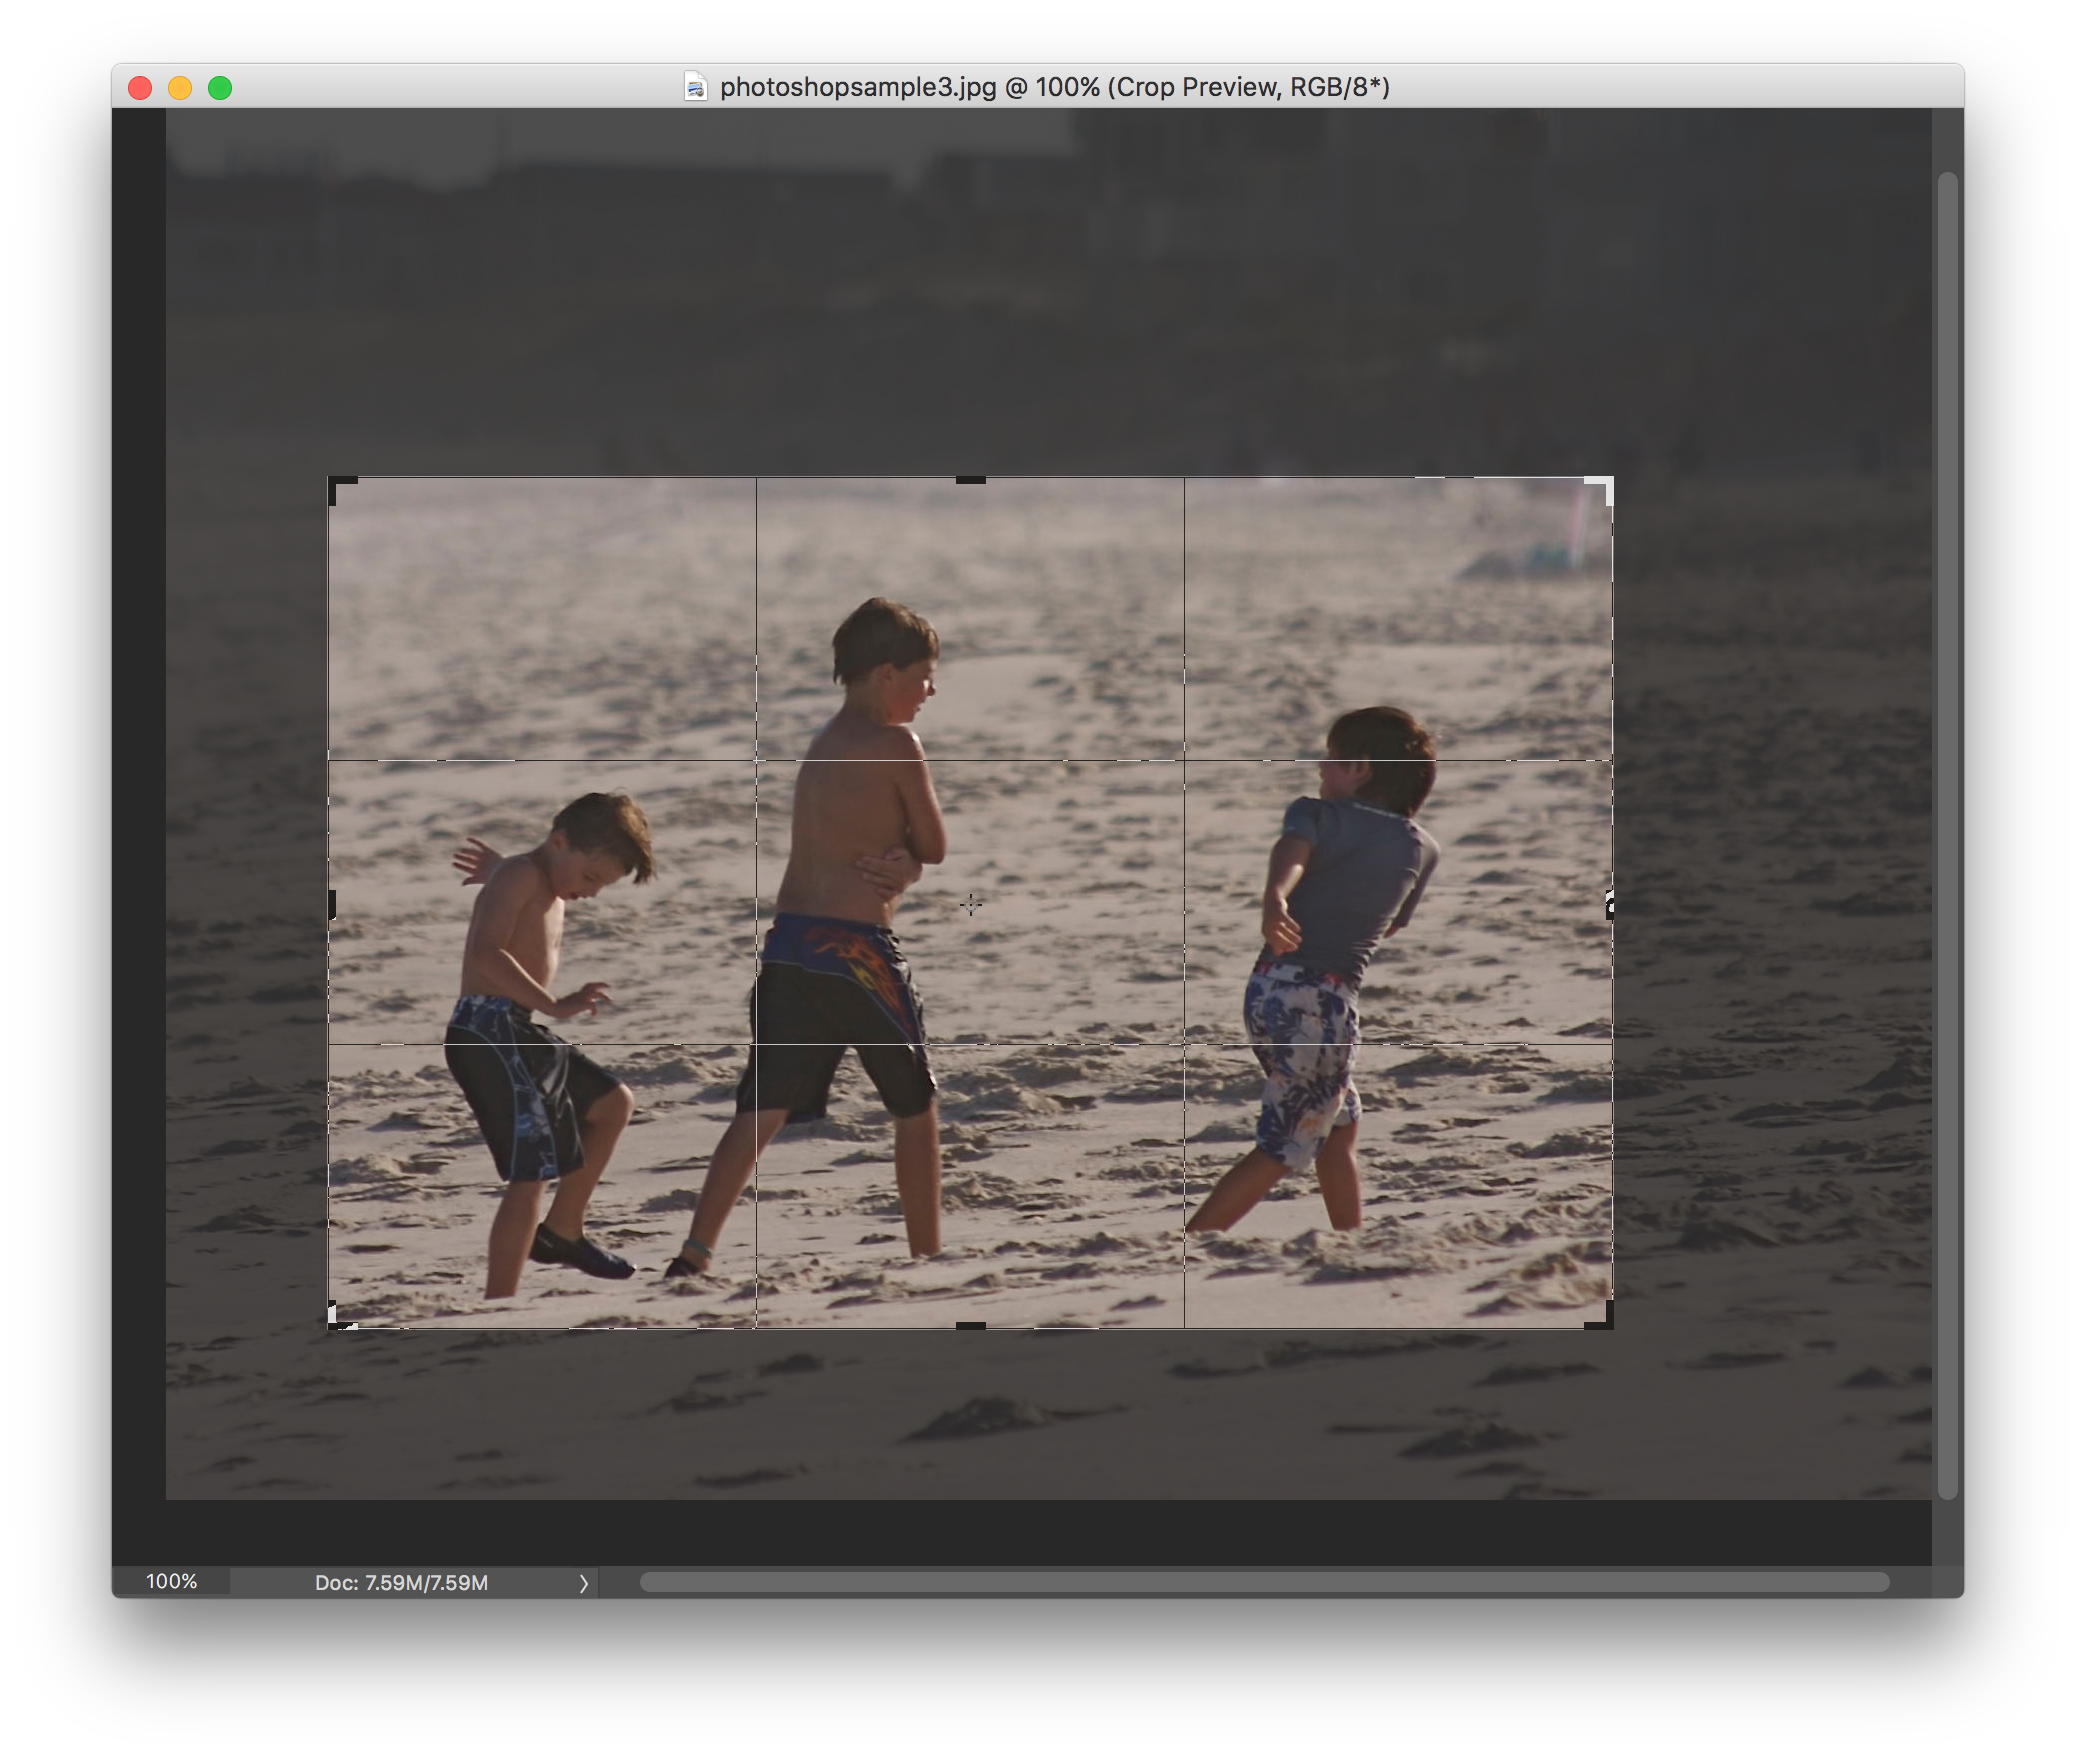
You can click and drag on the black corners/bars — called anchor points — that surround the box to reshape your crop.
Hover over the boxes to see your mouse cursor change into different arrows that indicate how that anchor point will shape the crop if you click on it.
Hover your mouse arrow just outside one of the corner boxes to change your cursor into a curve. This curve indicates that it will rotate your crop. Generally, you never want to tilt your crop, but occasionally if the photo was taken at a tilted angle, this is a great solution for straightening your crop.
You can confirm or cancel your crop in a number of ways. You can use the cancel icon (looks like a no-smoking circle) or the OK icon (looks like a checkmark) that is located at the top right of the options bar.
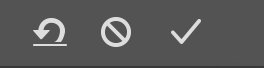
You can also use some very simple keyboard shortcuts. Press Return (Enter, on a PC) to confirm your crop, or press the Esc key to cancel the crop. You can also use the mouse by double-clicking within your image to confirm the crop, or clicking on another tool, which will bring up a warning dialogue box asking you to either confirm or cancel.
Resizing while cropping
You can actually resize the image as you are cropping. Essentially, you are telling Photoshop which dimensions the image should result in after your crop. This is sometimes at the center of some confusion because if you lock in dimensions, your crop box will be forced into a certain ratio.

Fill in the width and height fields in the option bar while the crop tool is selected. Don’t worry about the resolution, that’s for printing. If you are using the provided tutorial image, input the following dimensions:
width: 600 px height: 400 px
Important! Notice the PX suffix. This is very important, because Photoshop may default to “in”, which stands for “inches”. Photoshop can be used for a number of purposes, including printing. Most monitors are just over 1000px wide. But if you convert 1000px into inches, it comes to only 13.9in. Therefore, if you accidentally type 1000in you will end up with over 72,000 pixels wide! When you draw the box, you will notice that the box shape is locked to a certain ratio. You cannot make it longer or taller, you can only adjust the largeness of the box. For this reason, if you feel like the box is in the wrong spot, don’t worry, you can move the box by clicking on the marquee after drawing it.You should also be careful about how small you crop. Depending on the number of pixels within your cropped area, you might actually be enlarging your photo – a big no-no in digital imaging. Computers do a pretty good job at shrinking images, but not so well at enlarging them. In order to make a small image larger, Photoshop has to use special algorithms to fill in the pixels. While it’s not terrible if you are enlarging by small increments, it will drastically reduce the quality if you push it too far.
Resize images
Resizing images in Photoshop
You don’t necessarily have to crop an image to resize it. That’s just an added plus if you were planning on cropping the image anyway. If you wish to resize your image without cropping, Photoshop offers a number of methods. This tutorial will show two methods, one here, and the other method when saving your photo at a later section. Click on the image menu. The image resize option will be found under here.
Once open, the image resize dialogue box will display. This box will present lots of options for a variety of purposes.
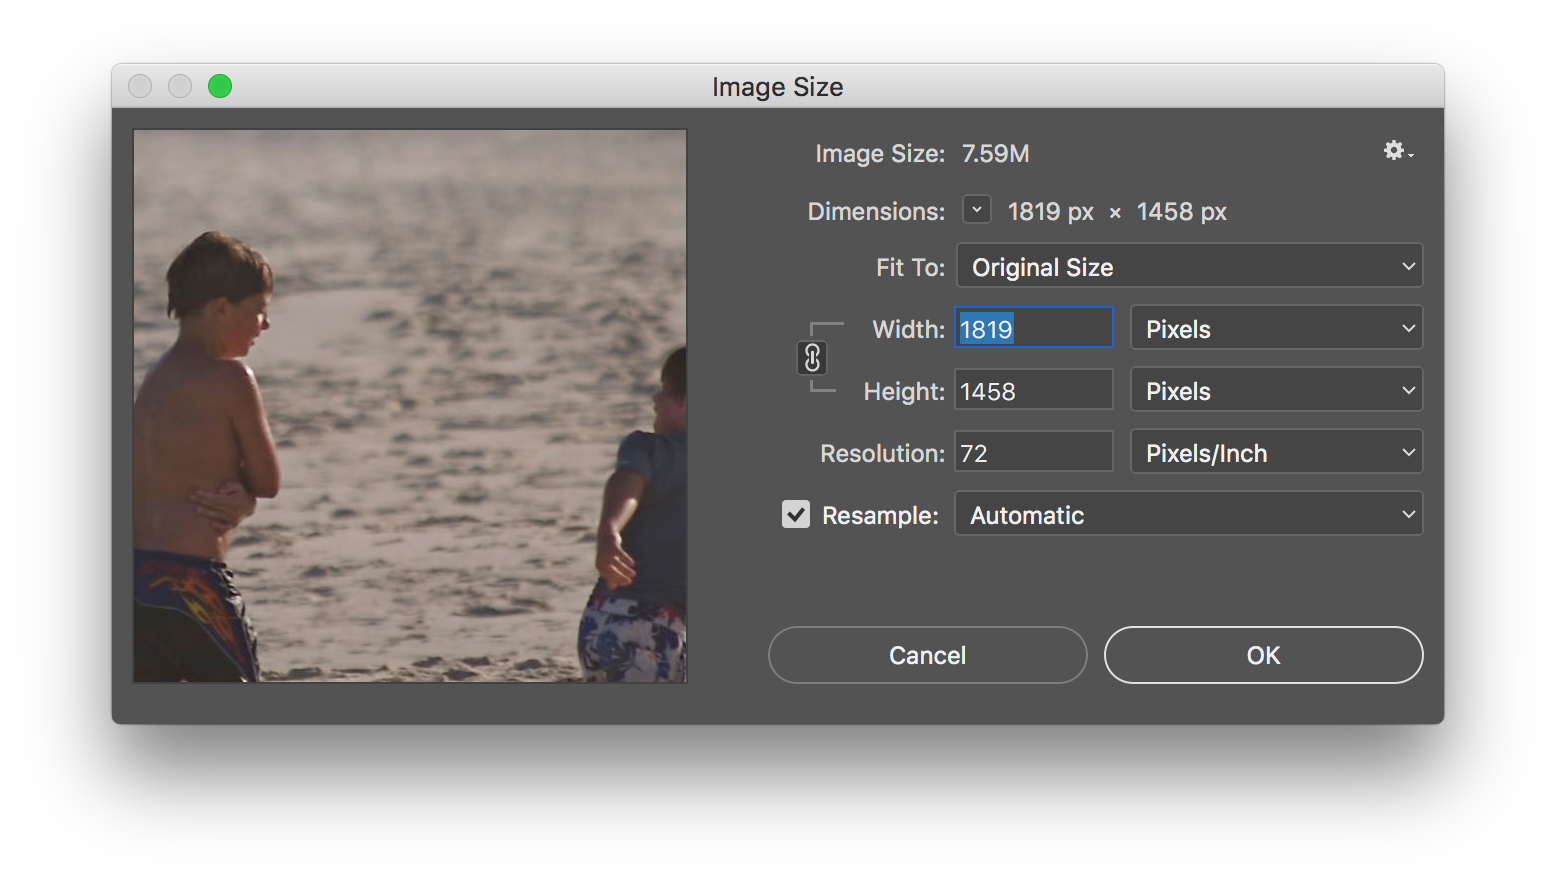
When the dialogue box opens, it will show you the current size of the image. To resize the image, simply type in the values of the height and width that you want.
Note that Photoshop’s default dimension setting is pixels. If you’re using your image purely for the web, you can leave this as is. If you plan to print the image and need it to be a specific size, you can choose inches or another dimension as needed.
Also note that next to the width and height information, there is a link icon that is highlighted by default.
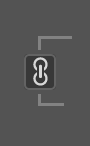
This constrains the proportions of the images, meaning when you change either the height and width the other value will change respectively based on the ratio of their dimensions. You should always leave this icon highlighted or else you will distort the photograph.
If for some reason, you cannot edit the width and weight, that means resample is not checked. Resampling the image is a fancy way for saying that you can change the size.
To follow along, change the width to 600 px. The height will automatically change depending on the ratio of the image.
Tones, Contrast and Color
One of the cornerstones of Photoshop is its ability to correct the tonal properties of images. In this example we’ll show you a couple of different methods of adjusting an image. There are many ways to adjust an image in Photoshop, and no one way is the correct way. Adobe simply presents a variety of methods to try. Some methods may work well in one particular situation, and other methods might work on other types of photos.
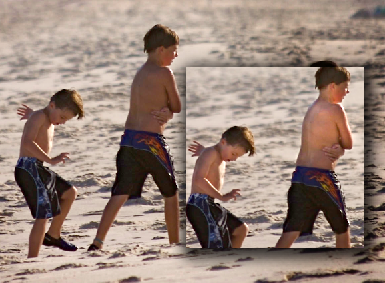
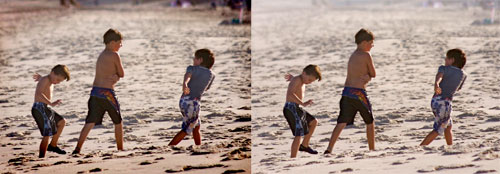
Take a look at the before and after pictures of the tutorial image:
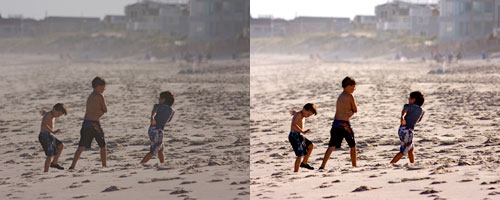
As you can see, the before image on the left was very flat and not particularly vivid. The image on the right was adjusted in Photoshop to add contrast and clarity.
Adjusting Levels
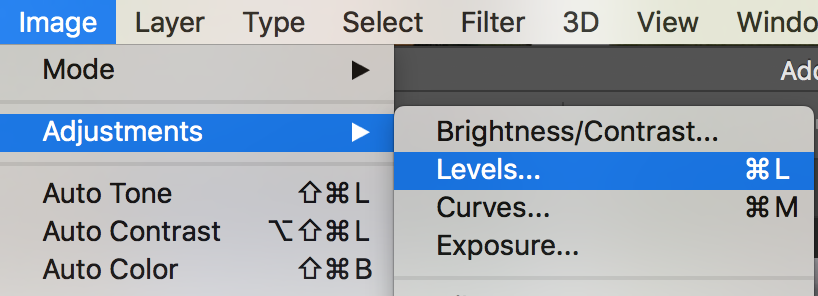
Levels is one of the more popular methods of adjusting photos. It’s very flexible, yet not too complex. You can get to levels by going to the menus Image → Adjustments → Levels.
The levels dialogue box displays a histogram and some small arrows called “sliders.”
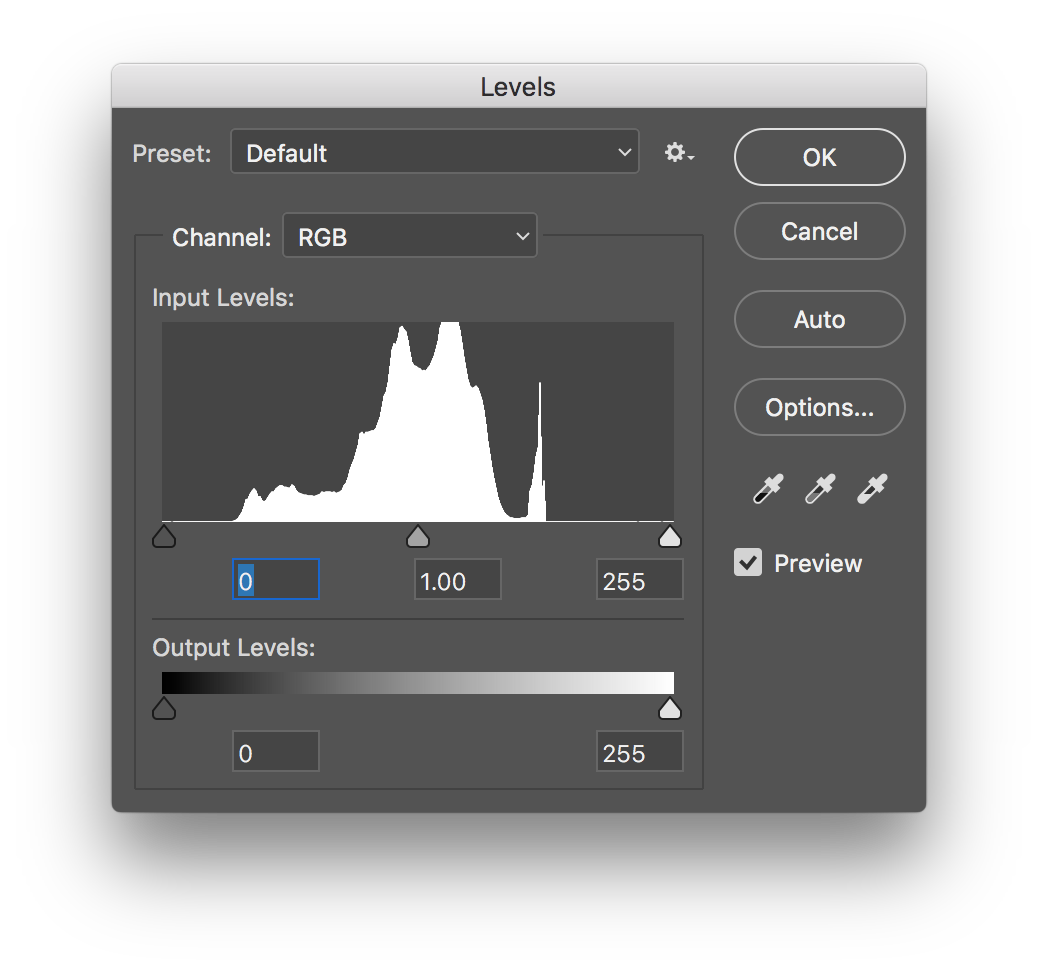
The histogram is a graph showing all of the values across the spectrum of the image. It could best be described like this: The left side of the graph is the shadows and blacks. The right side displays the highlights and whites. Imagine if we took every pixel from the image and sorted them into stacks; from darkest to brightest. This graph is what we would come up with.
Notice from this graph, there are hardly any black tones, and hardly any white tones, as the graph is rather flat on the edges.
To adjust this image, we move the three slider arrows at the bottom to their appropriate settings. The black slider arrow defines the black point, that is the darkest part of the photo. The white slider defines the white point, the brightest part of the photo that is white. The middle slider adjusts what are called the mid-tones.
Drag the outside sliders inward until the are lined up with the edge of the histogram.
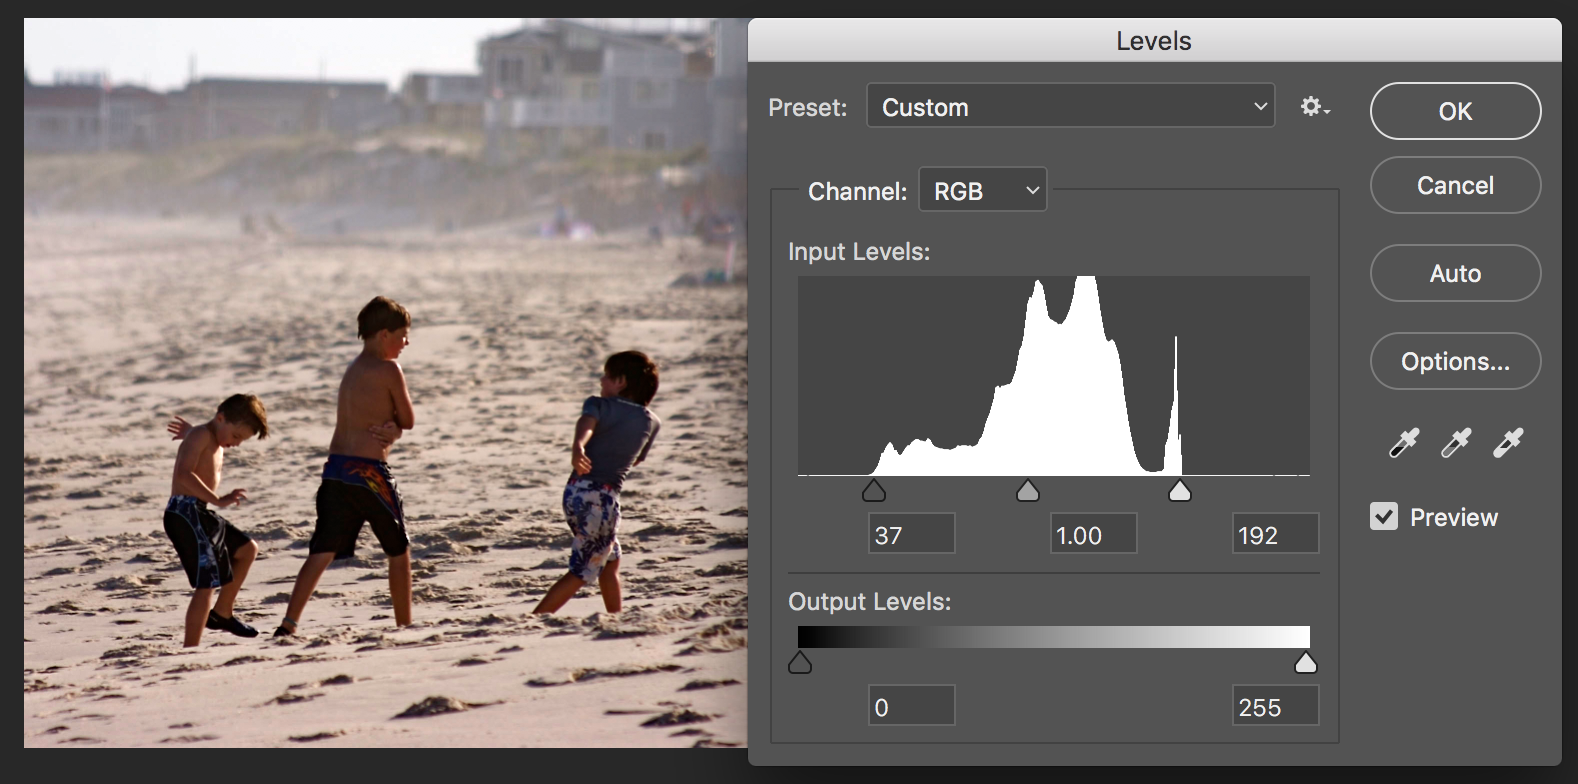
You will immediately notice how the contrast picks up tremendously. That’s because this image didn’t have a very solid white or black point. We’ve moved the sliders to define the darkest tone of this image to become darker — blacker. And respectively with the white tones.
Next, adjust the middle slider to set the midtones of the image. This adjusts the overall brightness of the image. Watch out, too bright will muddy the shadows, and too dark will make it difficult to see faces.
Adjusting colors using levels
You can also adjust the colors of an image using levels. Simply select the Channel option at the top to choose one of the three primary colors.
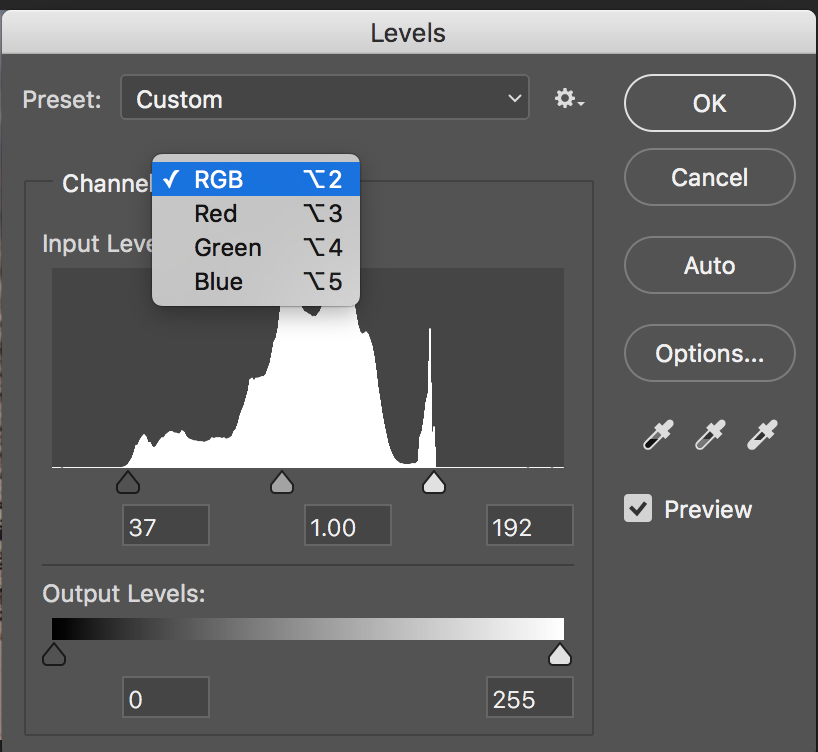
While it might seem that you only have three choices, you actually have six. Each choice allows you to either increase or decrease that particular color from the image (sliding either the white point, black point, or mid-tones). If you subtract a particular color, it’s relative secondary color will start to emerge in the image.
For example, let’s say you want to add some yellow to your image. Well, there isn’t an option for yellow, but you can get yellow by subtracting blue. Set the channel to blue, and slide the black slider inward:
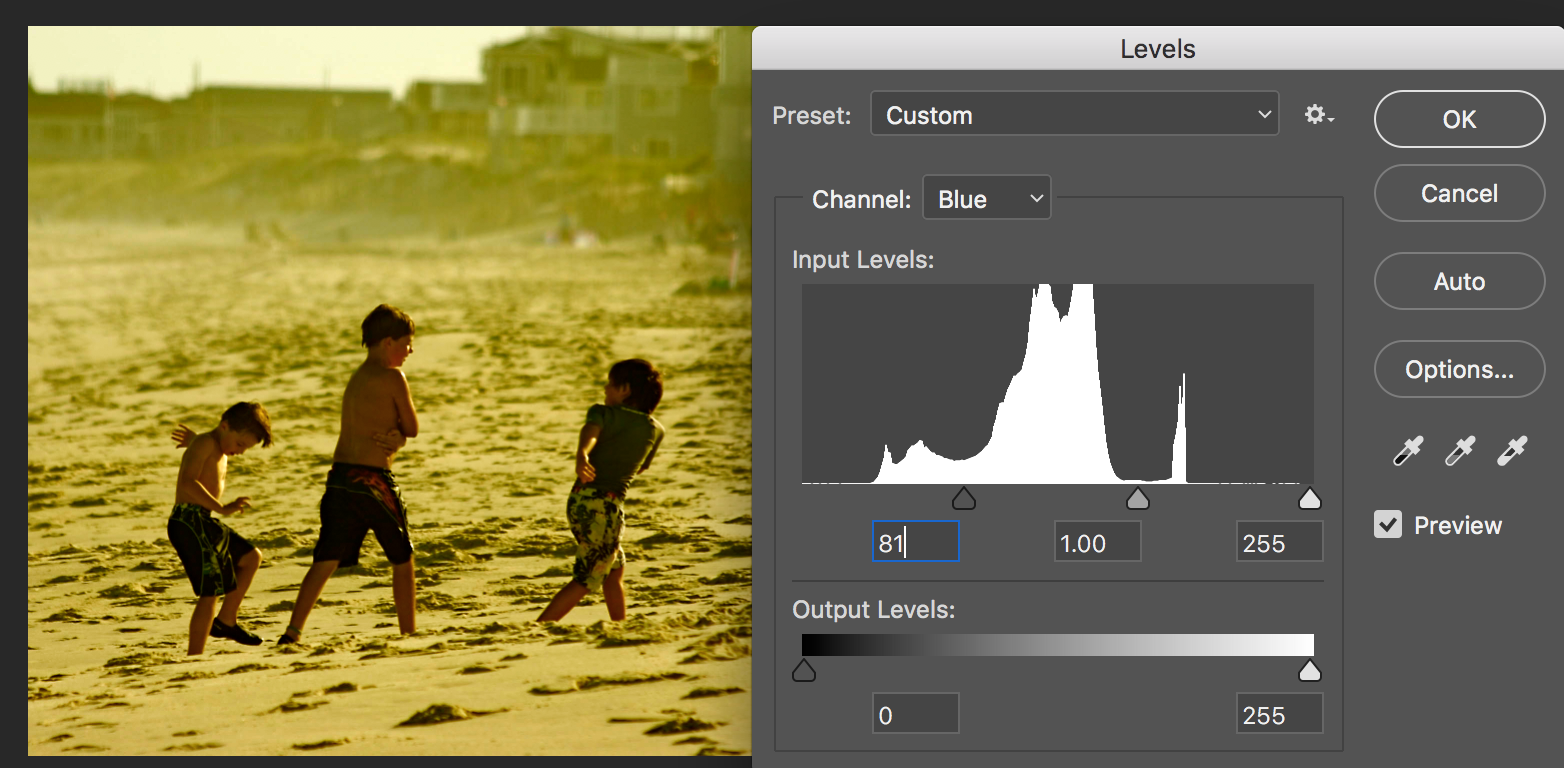
There are other, perhaps more exact, ways to do this using the Color Balance dialogue. That’s beyond the scope of this tutorial, however.
Dodging and Burning
While there are many ways to adjust the entire picture as a whole, many times you will need to adjust only a portion of a photograph. One part of the photo may be too dark or too light.
That’s where we will get into a few simple editing tools to adjust only portions of the photo.
Dodging and Burning
A throwback to the days of working in darkrooms, dodging and burning really mean “lightening” and “darkening” portions of the photograph respectively.
You can access these tools on the toolbar. One looks like a black lollipop, the other looks like a hand forming a circle.
This particular photo example probably does not need a lot of dodging or burning, but with a few adjustments, we can help improve the overall impression to make the photograph “pop.”
When you select the dodge or burn tools, the option bar at the top will give you a new set of parameters to adjust the tool’s usage (as with any tool you select).

One of the techniques for using either the dodge or burn tool is to adjust these settings so that you only change the photo in small increments. Use the exposure setting to adjust the amount of dodging or burning that occurs with each pass. The range will specify the range of tones that will be affected. Generally, you want to lighten highlights and darken shadows. This will ensure that the photo maintains a steady level of contrast as you adjust the photo. If you need to brighten shadows or darken highlights, then use the midtones setting instead. The brush size will specify the size of the tool you will be using.
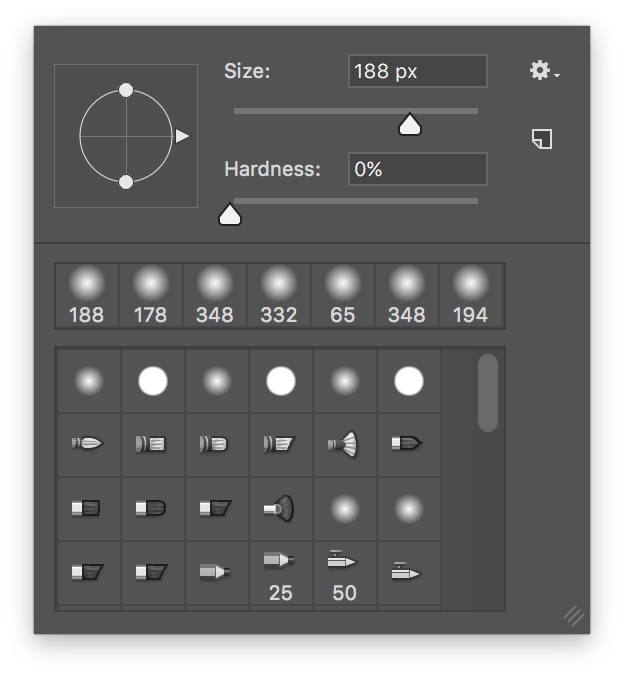
The master diameter is the size of what Photoshop calls the “brush” size. The hardness refers to how soft the brush’s edges are. Generally with a tool like dodging or burning, you want a low hardness setting to offer the softest brush. If you are trying to be more exact, you can increase the brush hardness, but increase the chance that the touch-up will be noticeable.
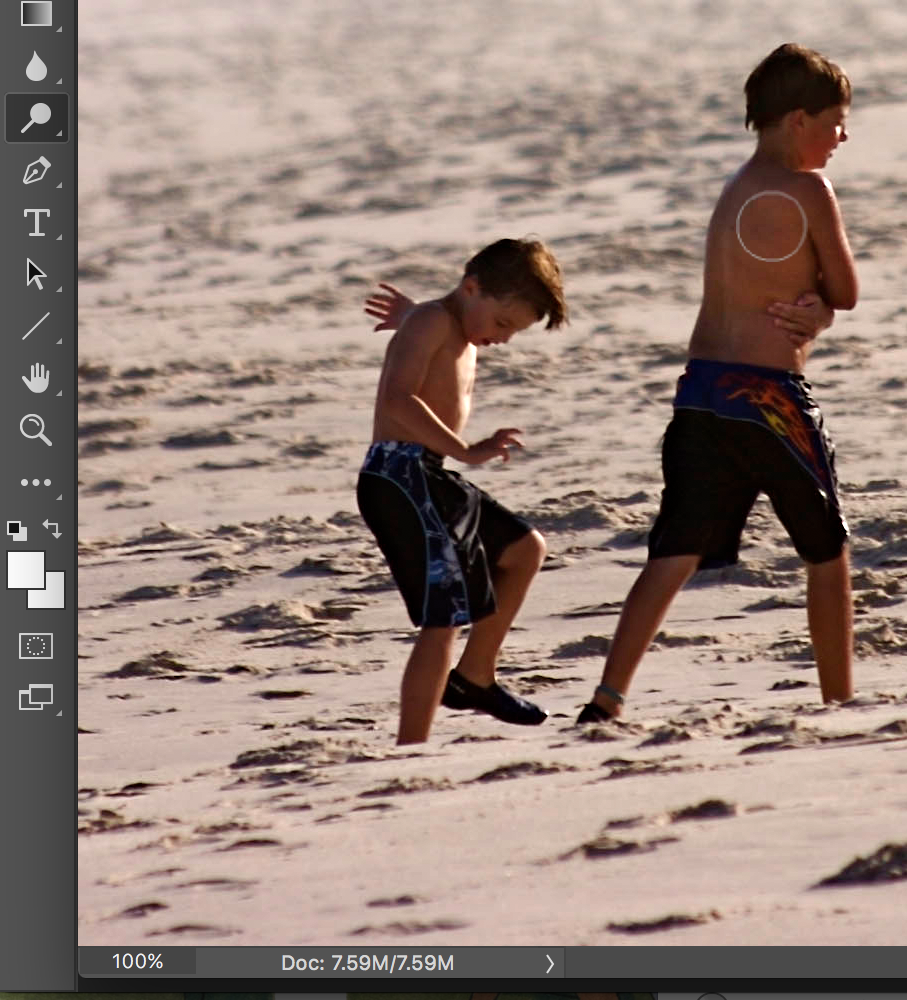
Dodging or burning usually requires several passes and changing the brush size several times to get to all of the details.
As you can see in this sample photo, after dodging, the shadow on the boys brings out detail.
Another practical use of the burn tool is to perform a technique called vignetting. This is a technique where the corners and edges of the photo are darkened slightly to help define the edges of the photo and help guide the viewer’s gaze toward the middle of the photo.
Vignetting is a common practice with many photojournalists, but can be controversial if overdone. Ethical standards vary, but the general rule is whether one is modifying the photograph beyond a point where it’s deceptive to the viewer. Also be mindful that these days digital photos tend to be held to a higher standard because of the ease in which they can be manipulated.
Sharpen
Sharpening is a technique in Photoshop that can really make a photo “pop” (a common term photographers use to mean making a good photo better.)
It works by increasing the contrast of edges found in the photograph, thus giving the appearance of a sharper or clearer photograph.
It should be said, though, that using the sharpening filter cannot make a blurry, or out-of-focus photo, into a sharp, or in-focus photo. Despite its reputation for making photos look better, Photoshop can’t salvage poorly focused photographs.
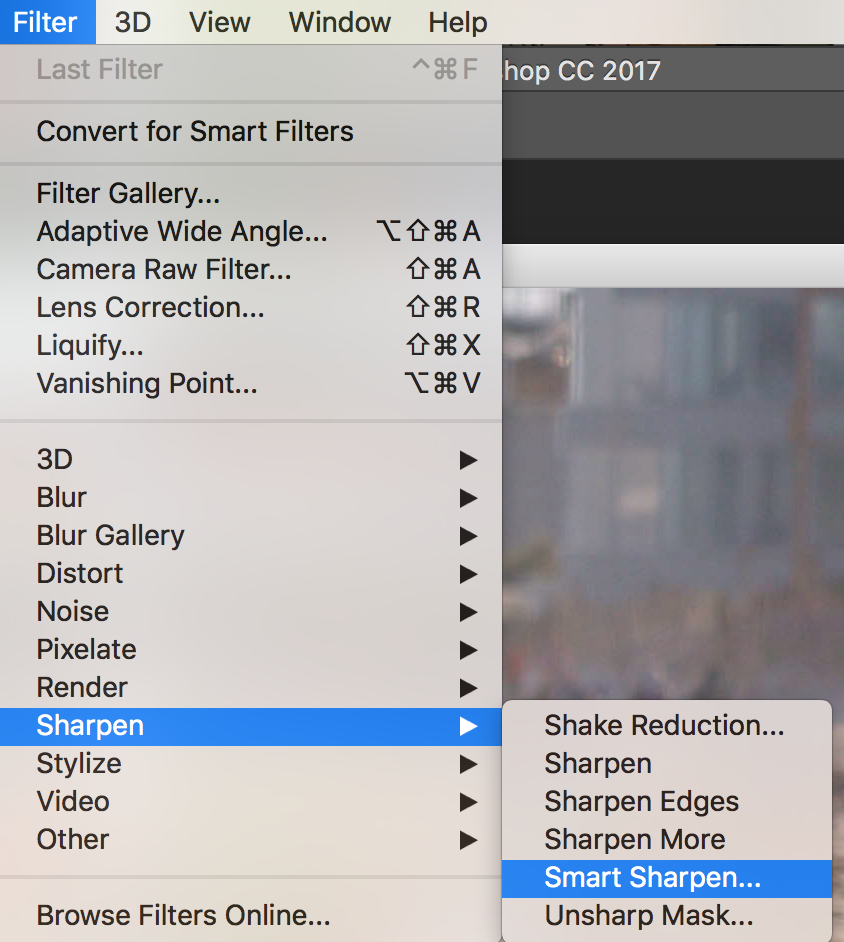
Sharpening is what is called a “filter” in Photoshop, therefore it can be found in under the filters menu.
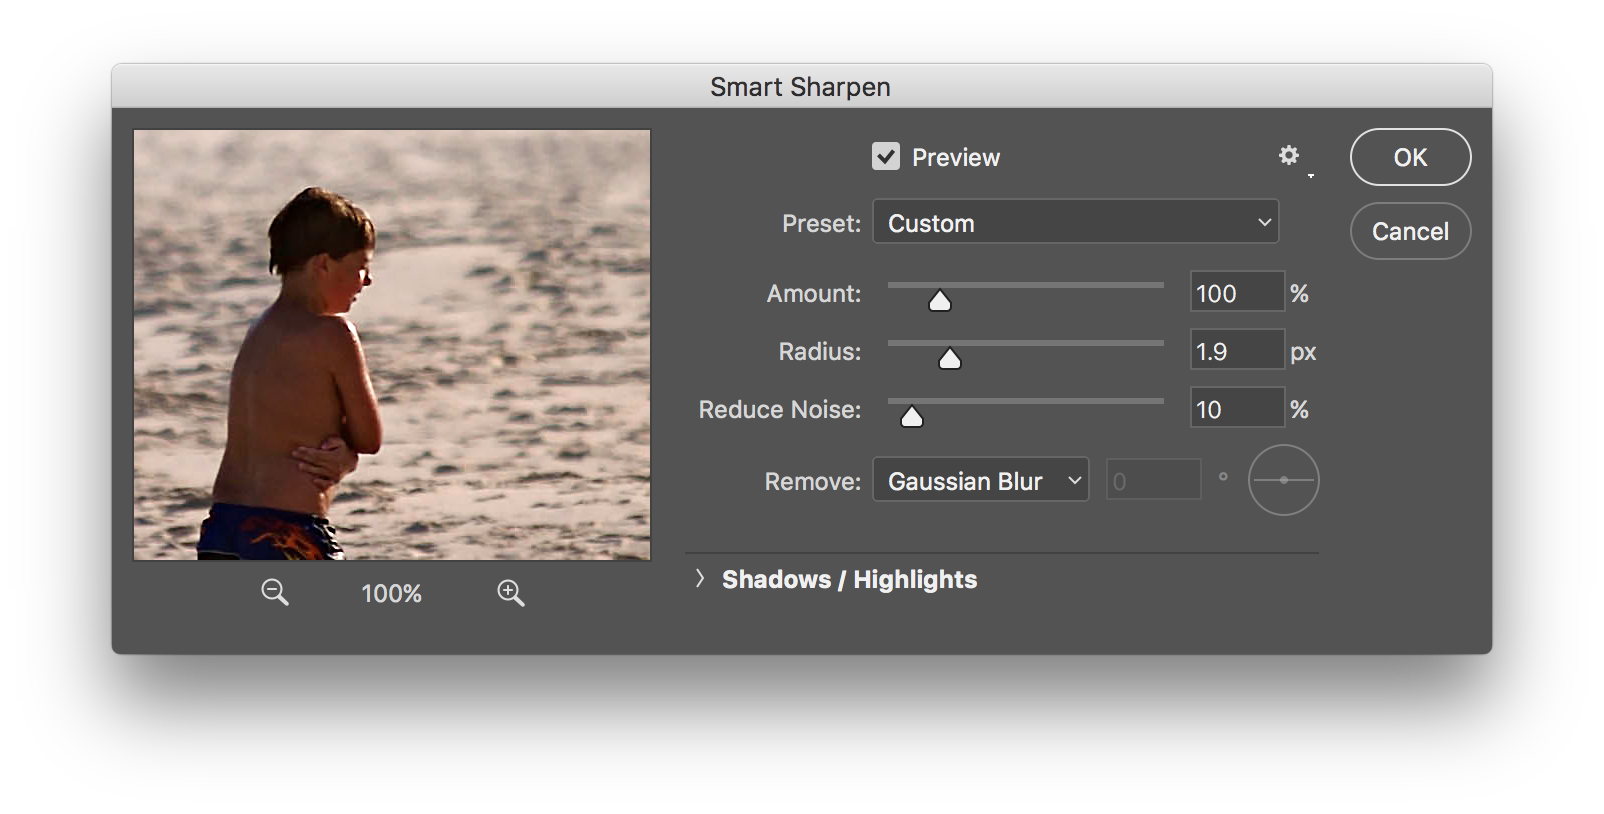
The Smart Sharpen filter offers a closeup preview of the photo on the left with the filter effect added. You can easily compare this to the original by either clicking the “Preview” checkbox or by clicking on the preview and dragging around.
The amount specifies the amount of sharpening to add to the photo. Remember, how sharpening works is by looking for edges in your photo and increasing the contrast. It’s really easy to “over sharpen” a photo, giving the edges an odd halo effect. Radius specifies the distance in pixels from the edge the sharpening filter should reach. Generally the blurrier the photo is, the more radius you will have to use. Photos that are in focus will need less radius.
Remove specifies the type of blur you are trying to remove. Gaussian refers to a general softness, lens blur refers to out-of-focus blur, and motion blur refers to photos where a subject was moving too fast and became blurry in part of the photo. Picking motion blur allows you to specify the angle of the motion blur.
As with most tools in Photoshop, there are no “correct” combination of values to issue that will work with every photo. Each photo is unique and will require a different combination of values. The preview allows you to experiment with different values so that you can achieve the best production possible.
Save and Export
There are two methods to saving a photo in Photoshop, and each has a specific purpose. One way is to use the typical Save As…dialogue, the other is Export As…, which is used to save your photos in preparation for publication to the Web.
1) Save as: Use this method when saving your photo for archiving or if you plan to work on it later. We recommend saving the file type as a Photoshop or .PSD file, which will also save extra Photoshop-specific information about your photo.
2) Export As: Use this when you are ready to export your photo for publication to the Web. While it’s possible to save a photo with the regular “save as…” option and still publish it to the Web, the export as feature specifically prepares your photo for the Web and has added features that allow you to customize your file settings.
Save As…
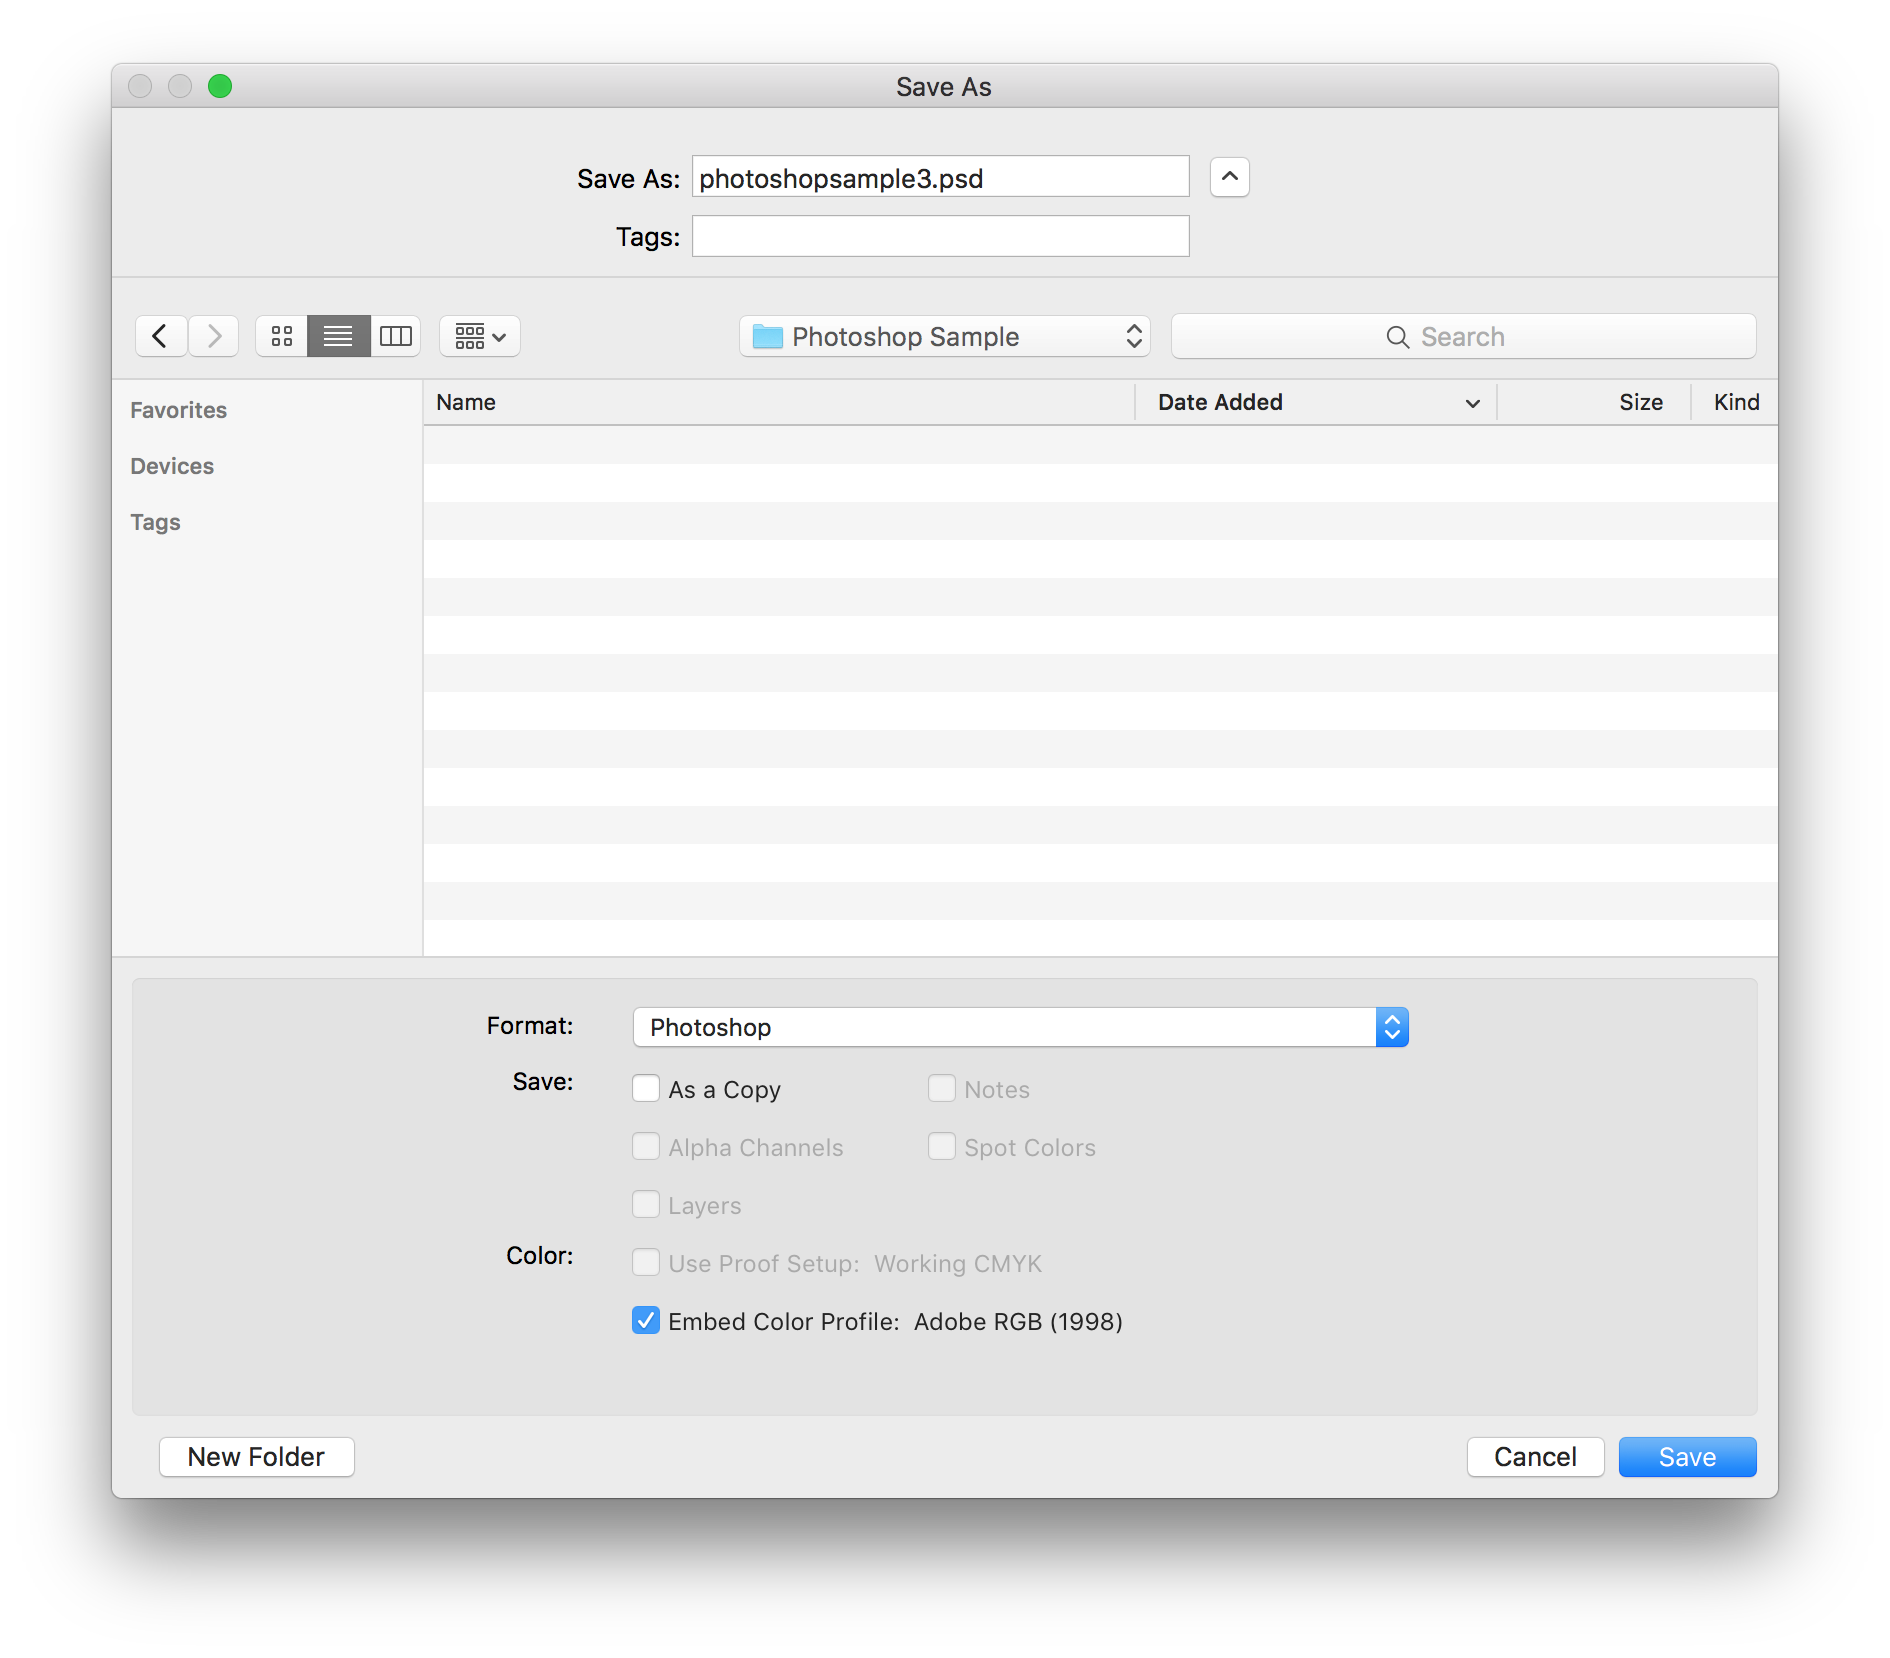
The Save As dialogue should only be used when saving a photo for archiving, or if you know that you will be opening it up again to work on it some more. This way, you can save you photo as an uncompressed Photoshop file (.PSD), and you will not lose any quality when you re-save it multiple times.
Export As…
Export As is a new feature in Photoshop CC 2017 that allows you to save a photo specifically for the web.
For those familiar with previous versions of Photoshop, Export As is set to replace Save for Web, though the two have slightly different features. Photoshop is likely to phase out Save for Web, but it is still available in the current version under File → Export → Save for Web (legacy), if you’d like to access it.
Export As (found under the File menu, Export) allows you to see a live preview of your photo as you make changes to the file settings.
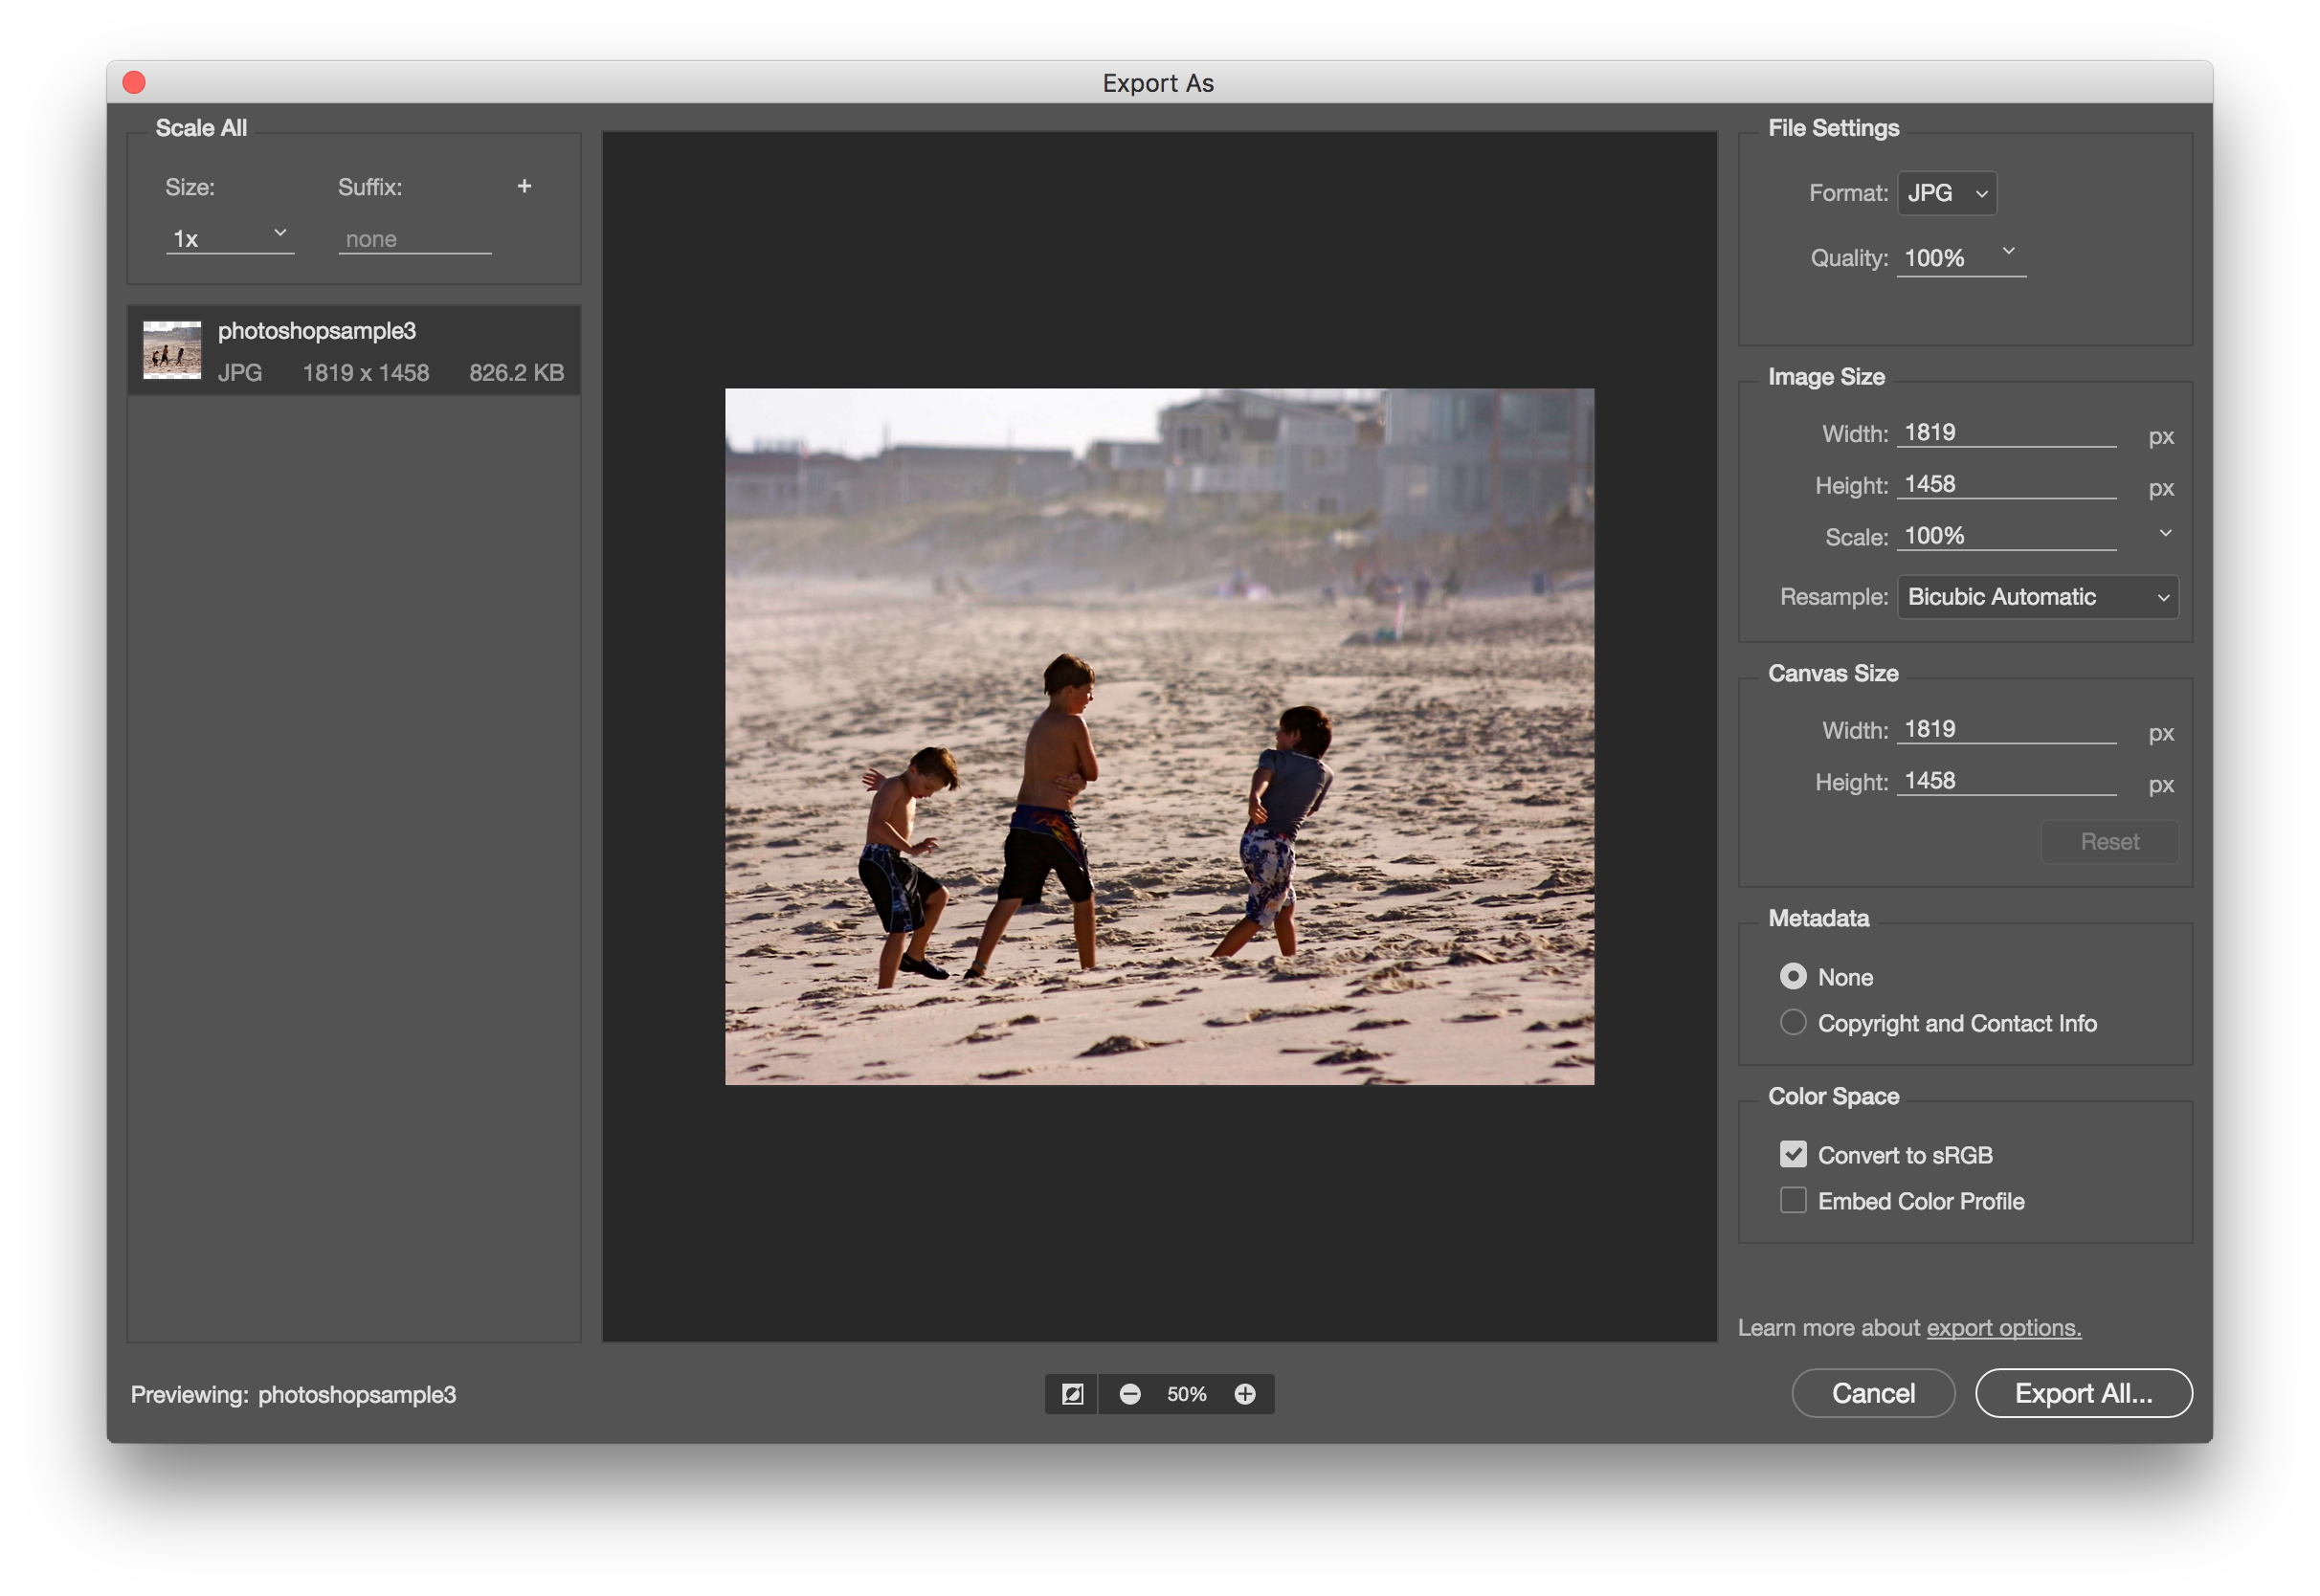
Export As gives you several file format options from the dropdown menu:
-
GIF (Graphics Interchange Format): This option is intended for graphics with solid colors. Think about an image of a cartoon character, which is made up of lines and fills. The “dither” options are for graphics that have gradations in color. The higher the dither, the finer the gradients will be, but the larger the image size. GIF is generally not a good format for saving photographs as it will not correctly represent the many levels of color.
-
JPEG (Joint Photographic Experts Group): This is the standard for saving photographic images. JPEG is one of the most widely used formats for photos on the Web and does a very good job of squeezing file sizes down while maintaining quality. Photoshop offers three quality settings, and within each preset you can further adjust the quality to a higher degree of granularity.
-
PNG (Portable Network Graphics): PNG was developed to build upon and even replace GIF. The PNG format is best used for graphics, but it is possible to be used for photos. Generally the file size will be considerably larger when used for photos. PNGS are most notable for their ability to display transparency, or invisible areas within a photo. This also allows oddly shaped images like circles, etc.
-
SVG (Scalable Vector Graphics): SVG is file format used for illustrations, animations, and other graphics on the web and can be scaled to different sizes without losing resolution. As it is used more often for graphics than photos, it is not recommended that you save photos in SVG.
Compression
The idea of compression is to shrink down the file size of the photo so that it loads on the user’s computer quickly, but maintains a certain level of quality. There are no hard-and-fast rules to how large a photo should be, but in general the smaller, the better. If one had to quantify the file size range for photographs one could place them into these categories:
- Small photos and graphics: 10k to 20k
- Medium photos and graphics: 30k to 70k
- Large photos (usually one per page): 100k – 300k
Resizing
One of the nice things about the Export As feature is that it will show your image at the size it will appear on a Web site. If you see a gigantic photo, then you will have to resize it. There are two methods to resize photos. One method can be done in the main part of the Photoshop program as outlined above, the other can be done in the Export As dialogue box.

To change image size, simply change either the Width or the Height dimensions in the Image Size section on the right side of the Export As dialogue box. If the proportions are constrained, the respective value will also change. As you make changes, you should see the preview image size change in real time. To apply the changes and save your file, click Export All.
Generally, you should only shrink an image, and never expand one, as you will lose considerable quality.
Saving v. Exporting
It should be noted however that saving a photo using the Export As feature only saves a copy of your image. This means you will still have to save your original photo for archiving, or if you intend to reopen it later, use the regular Save As… menu item. Keeping a good organizational structure will help prevent mixing your photos up!
Additional tips
- If you ever have a hard time finding menu items, simply type in the name of that menu item in the search box under the help menu and Photoshop will point you in the right direction.
- If you ever need to know the name of the tool you are using, simply hover over the button for a few seconds and it will appear. (A shortcut for the tool will also appear in parenthesis.)
- Adobe has useful Photoshop tutorials on its website that can help answer questions or features not covered by this tutorial. (Google is also your friend!)
This tutorial was written by Jeremy Rue.
Copyright UC Berkeley Graduate School of Journalism . Any code samples in these tutorials are provided under the MIT License
The above copyright notice and this permission notice shall be included in all copies or substantial portions of the Software.
THIS PAGE IS PROVIDED "AS IS", WITHOUT WARRANTY OF ANY KIND, EXPRESS OR IMPLIED, INCLUDING BUT NOT LIMITED TO THE WARRANTIES OF MERCHANTABILITY, FITNESS FOR A PARTICULAR PURPOSE AND NONINFRINGEMENT. IN NO EVENT SHALL THE AUTHORS OR COPYRIGHT HOLDERS BE LIABLE FOR ANY CLAIM, DAMAGES OR OTHER LIABILITY, WHETHER IN AN ACTION OF CONTRACT, TORT OR OTHERWISE, ARISING FROM, OUT OF OR IN CONNECTION WITH THE INFORMATION IN THIS PAGE OR THE USE OR OTHER DEALINGS IN THIS INFORMATION.